





 Nederlands
 Italiano
 Português
 Română
 Español
 Ελληνικά
 Polski
 Türkçe


This guide shows how to create a bootable USB drive using Microsoft’s Media Creation Tool and then install Windows from that USB. Follow the steps carefully.
Step 1: Download the Media Creation Tool
Download Microsoft’s Media Creation Tool on the PC you want to prepare the USB on. You will use it to create a bootable USB installer for Windows.
After downloading, make sure you can find the file (usually in your Downloads folder).
Step 2: Open Downloads and run the Media Creation Tool
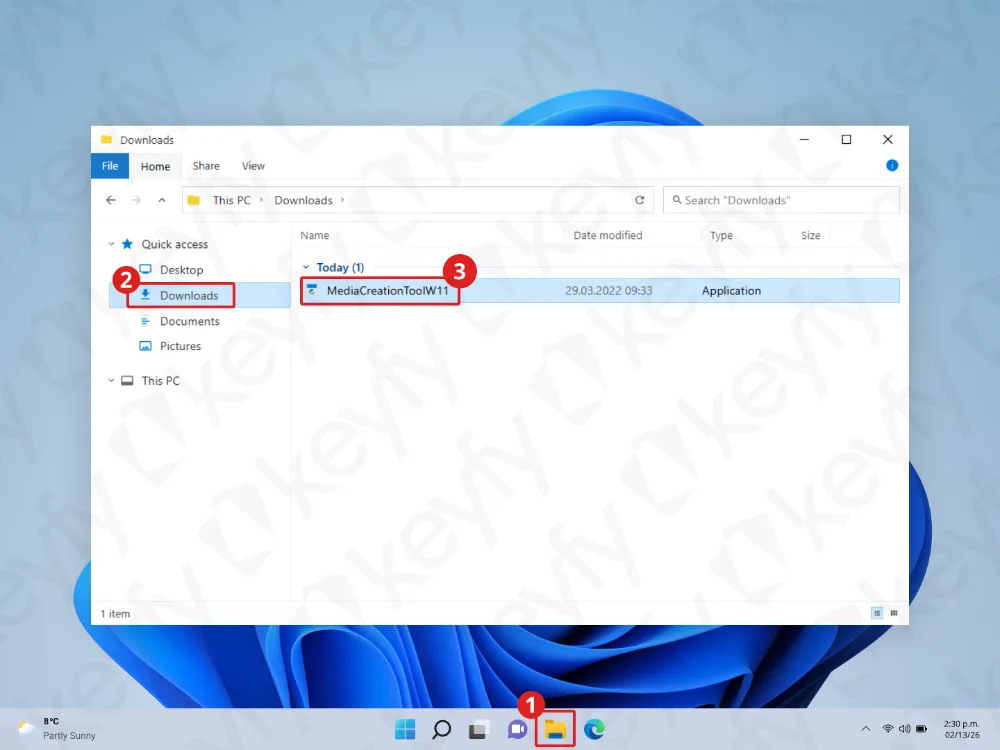
Open File Explorer, go to Downloads, and double-click the MediaCreationTool file to start it.
Step 3: Allow the tool to make changes
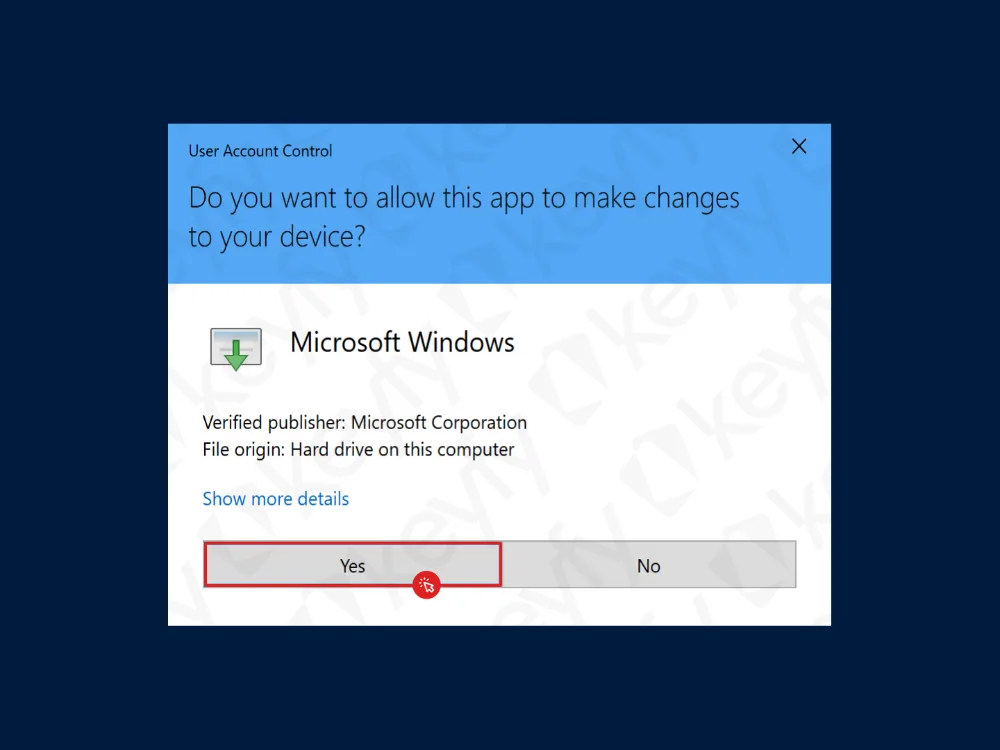
If Windows shows a User Account Control pop-up, click Yes.
Step 4: Accept the license terms
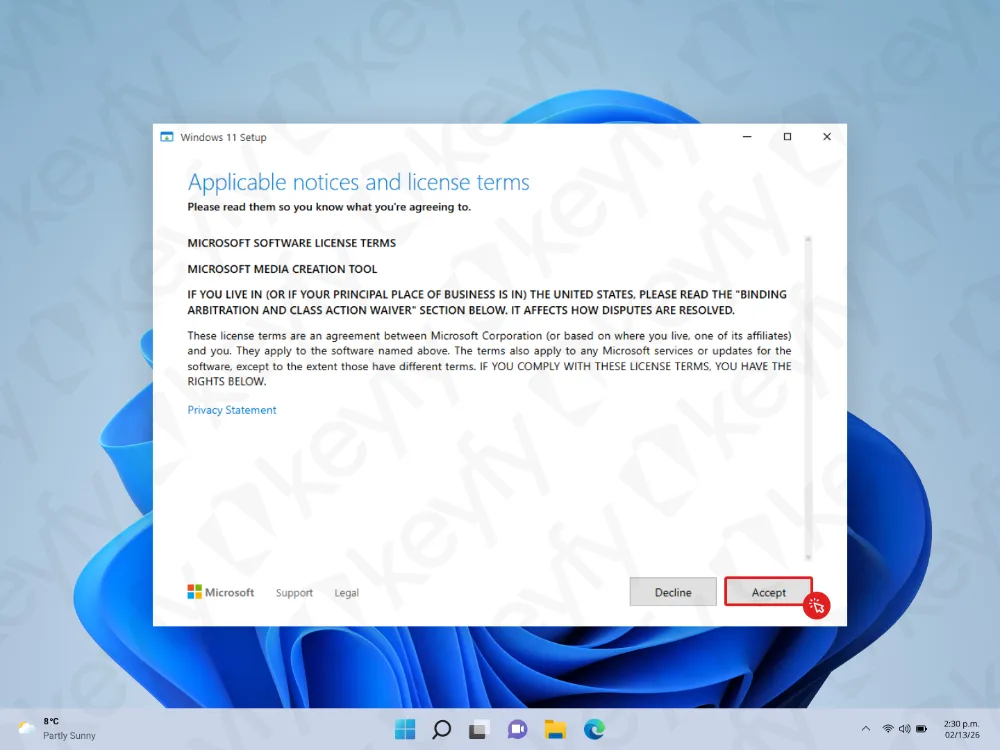
Read the license terms (optional) and click Accept to continue.
Step 5: Select language and edition
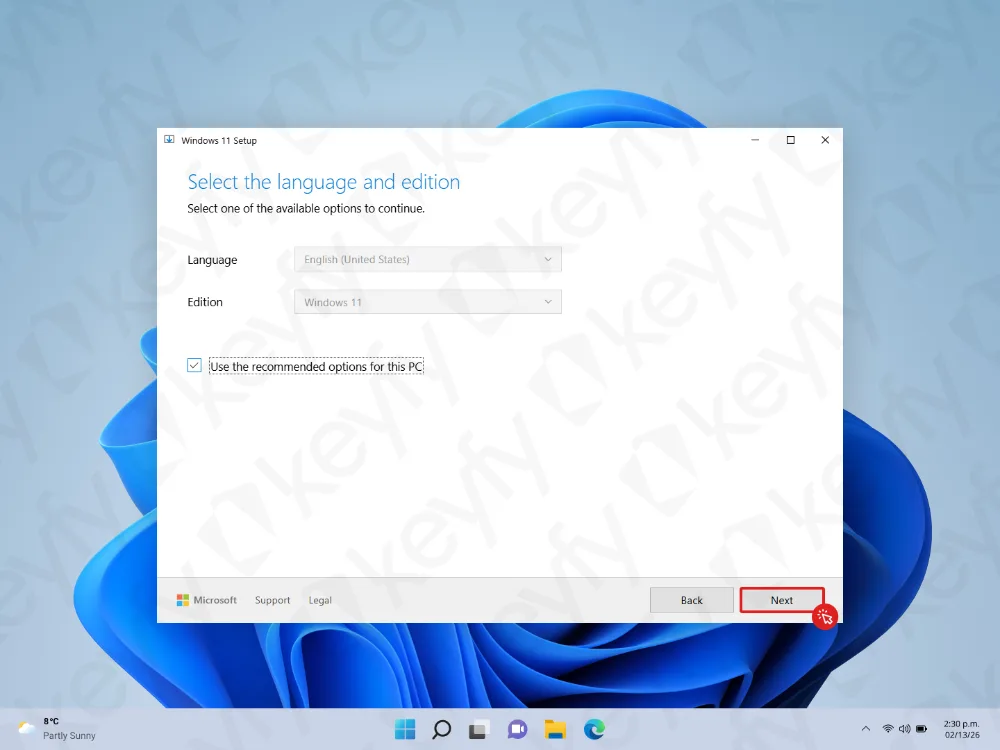
On the Select the language and edition screen:
- For most users, keep the recommended options selected.
- If you need a different language/edition, uncheck Use the recommended options for this PC and choose what you need.
Click Next.
Step 6: Choose USB flash drive
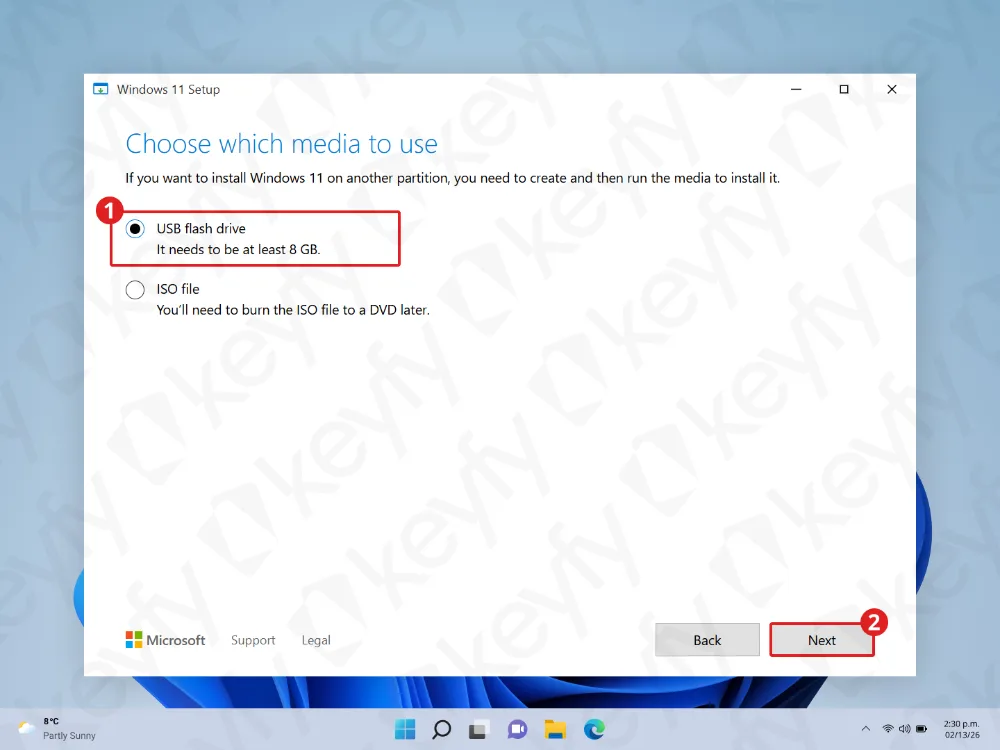
Select USB flash drive and click Next.
Important: The USB drive should be at least 8 GB.
Step 7: Select the USB drive
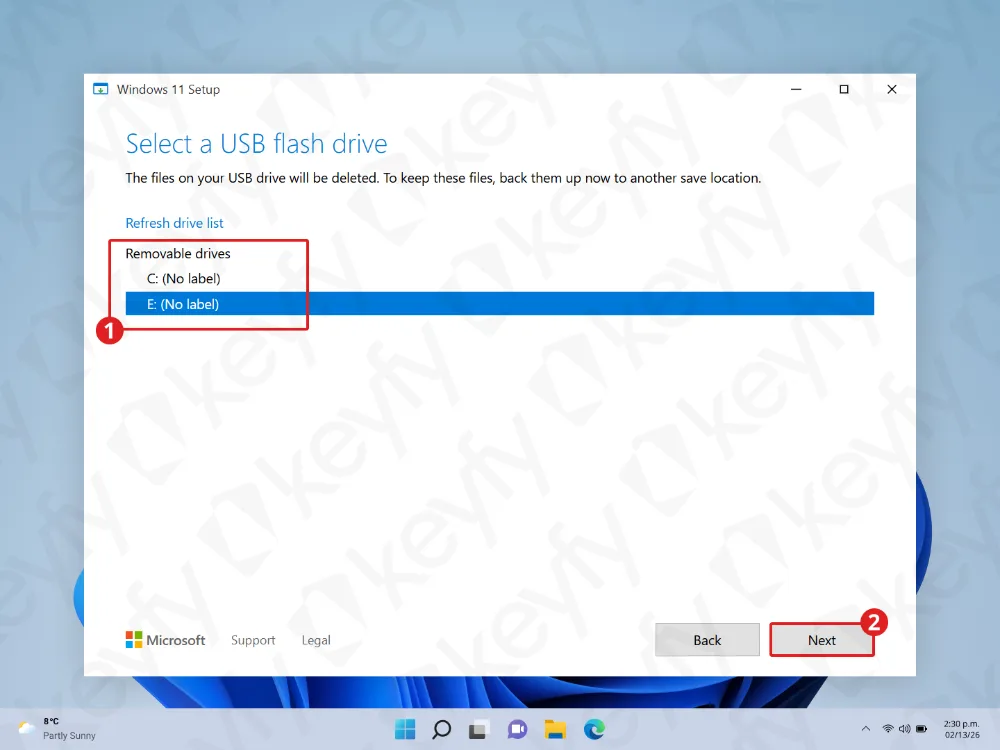
Select your USB drive from the list and click Next.
Warning: All files on the USB drive will be deleted. Back up anything important first.
Step 8: Wait while Windows downloads
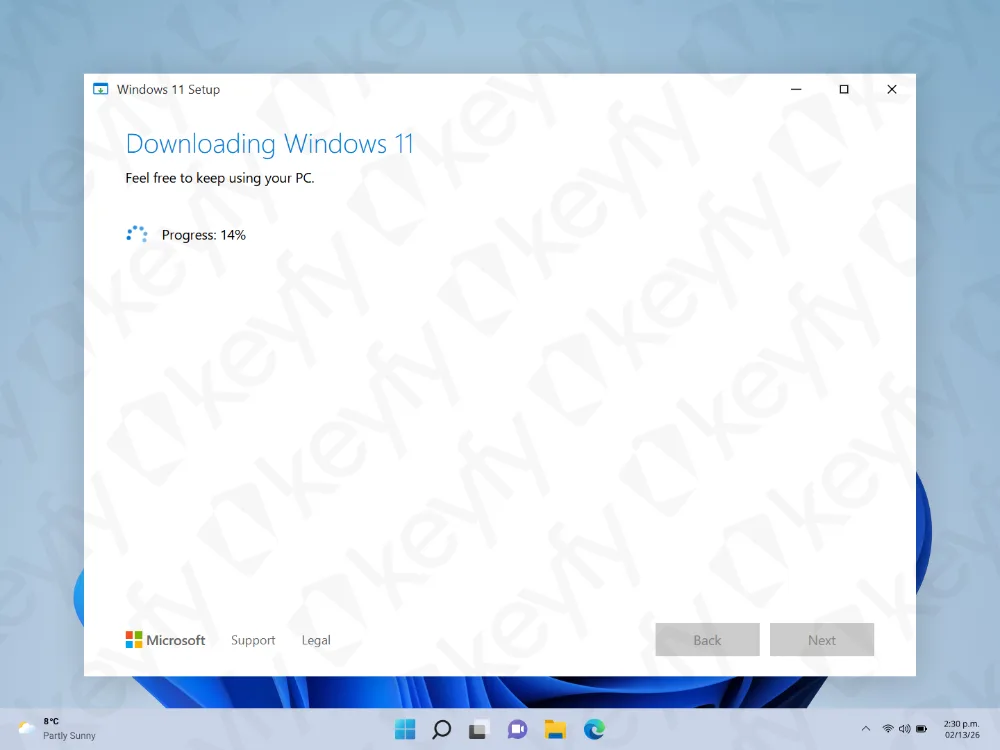
The tool will now download Windows and prepare the USB drive. This can take a while depending on your internet speed.
Keep the PC on and do not remove the USB drive.
Step 9: Finish — your USB drive is ready
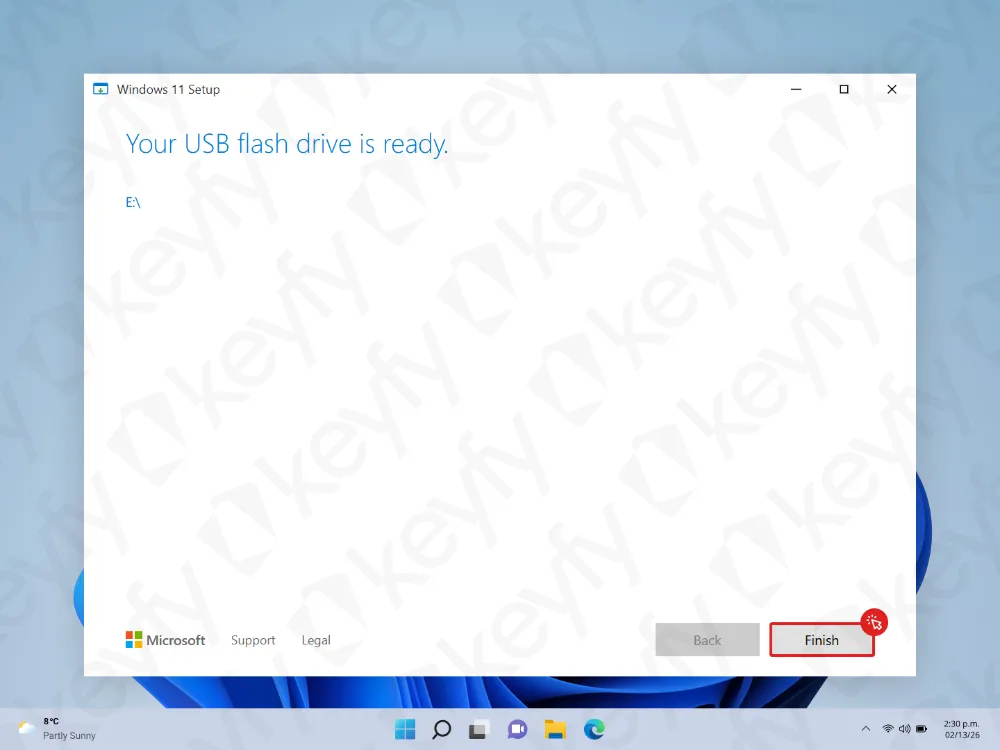
When you see Your USB flash drive is ready, click Finish.
Your bootable USB installer is now created.
Step 10: Restart the PC and open the Boot Menu
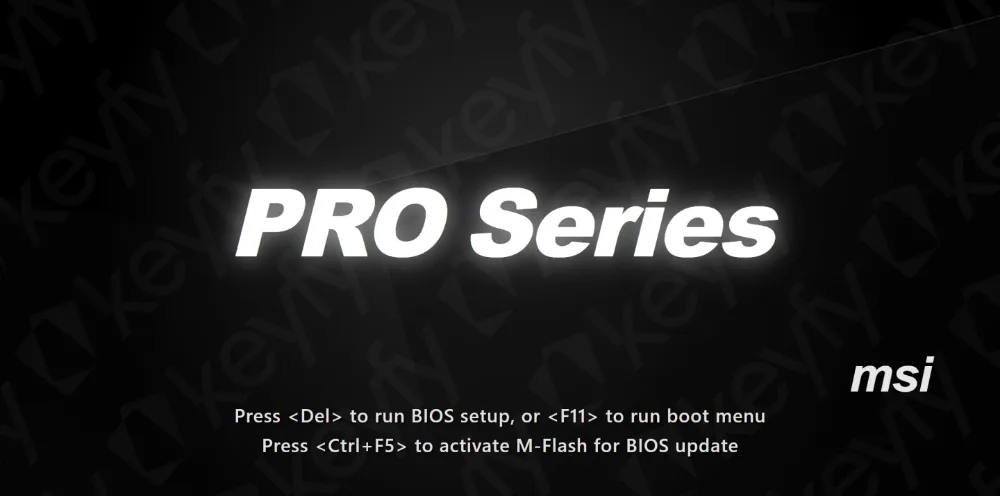
Insert the USB drive into the PC where you want to install Windows, then restart the PC.
During the first boot screen, press the key for the Boot Menu. This depends on the manufacturer.
- Dell: F12
- MSI: F11
- HP: Esc or F9
- Lenovo: F12 (sometimes Fn + F12)
- Acer: F12
- ASRock: F11
- Gigabyte: F12
If you’re unsure, search your PC model + “boot menu key”.
Step 11: Select the USB boot device
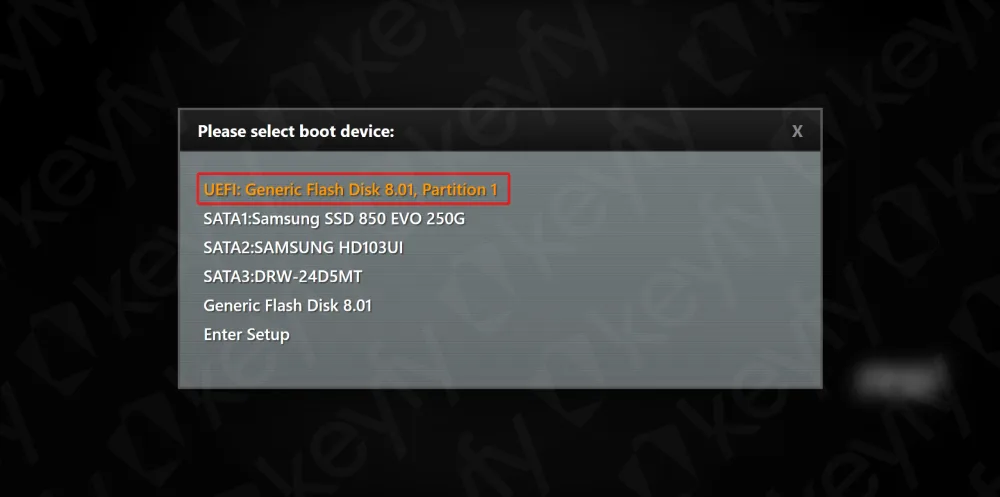
In the Boot Menu, select the USB device (often shown as UEFI + your USB name) and press Enter.
Step 12: Press any key to boot from USB (if prompted)

If you see the message Press any key to boot from CD or DVD, press any key on your keyboard.
Step 13: Choose language, time, and keyboard settings
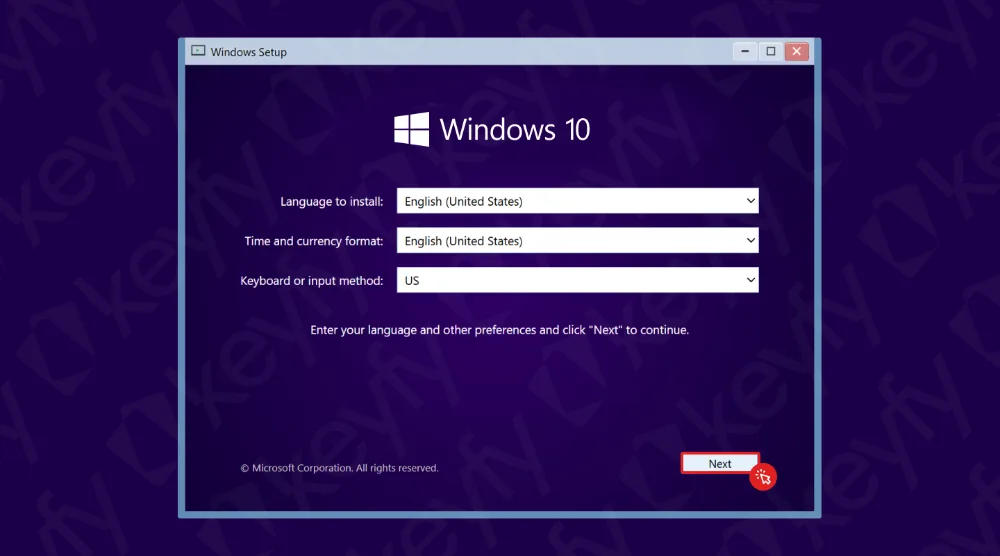
Select your preferred language, time and currency format, and keyboard layout.
Click Next.
Step 14: Start the installation
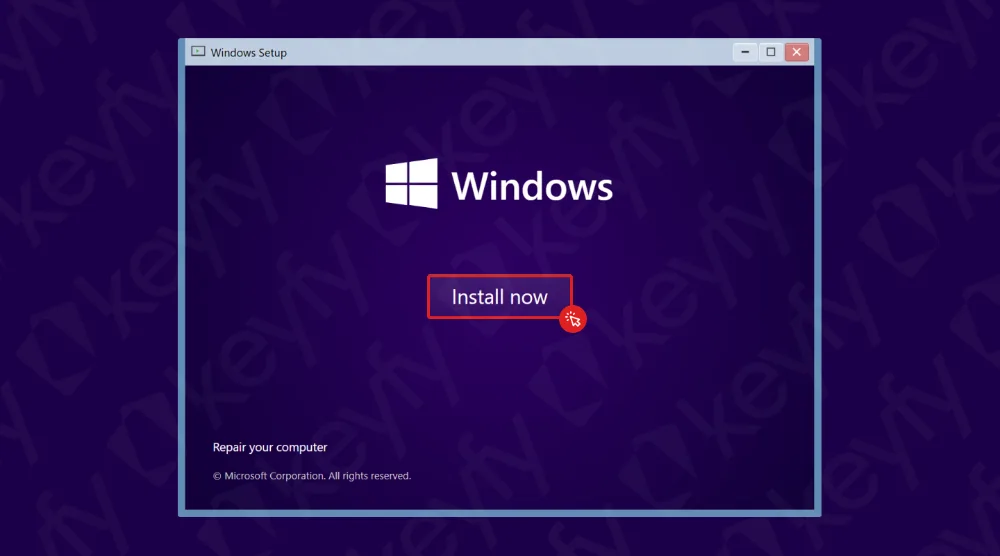
Click Install now.
Step 15: Enter your product key (or skip)
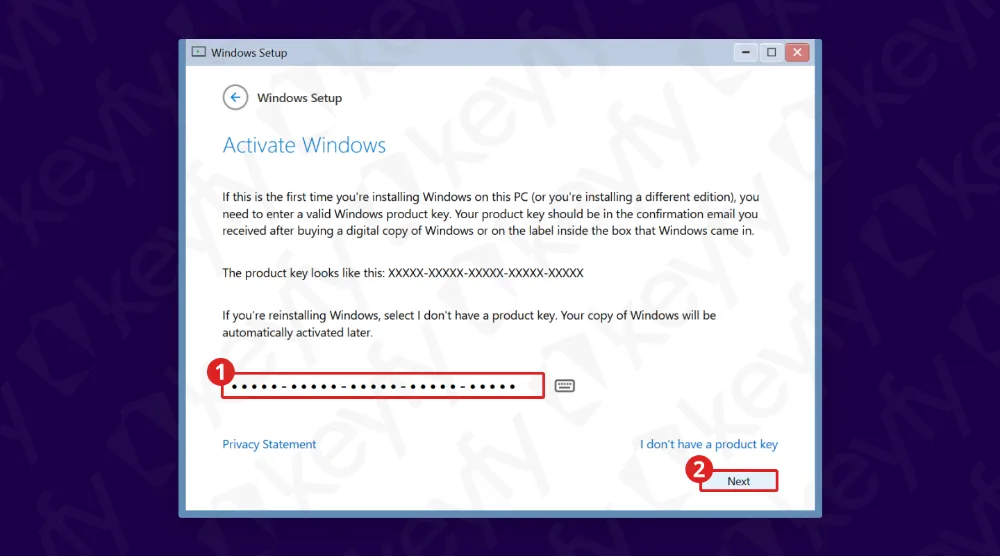
You have two options here:
- Option A (recommended): Enter your Windows product key and click Next.
- Option B: Click I don’t have a product key and activate later after installation.
Step 16: Select the Windows edition to install
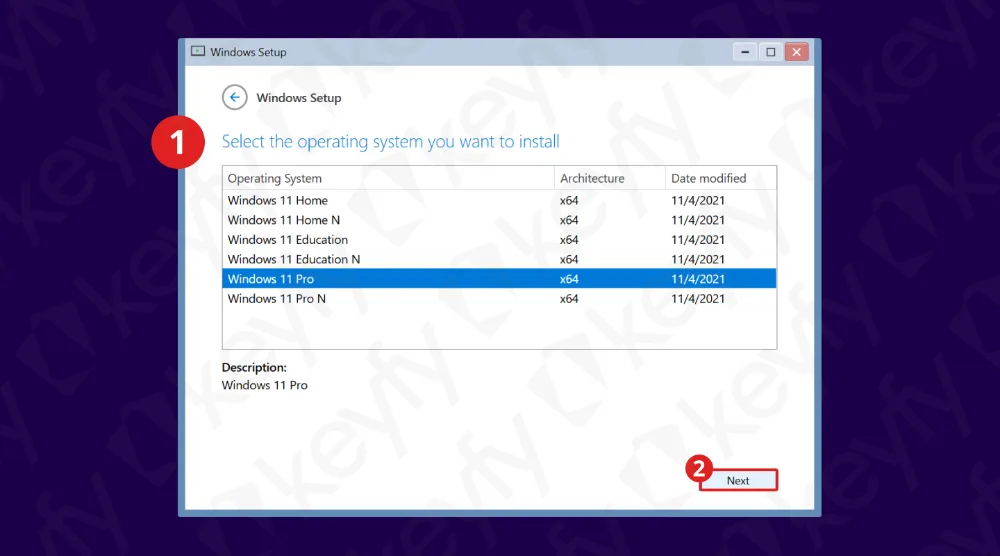
Select the Windows edition you want to install (for example, Windows 11 Pro), then click Next.
Step 17: Accept the license terms
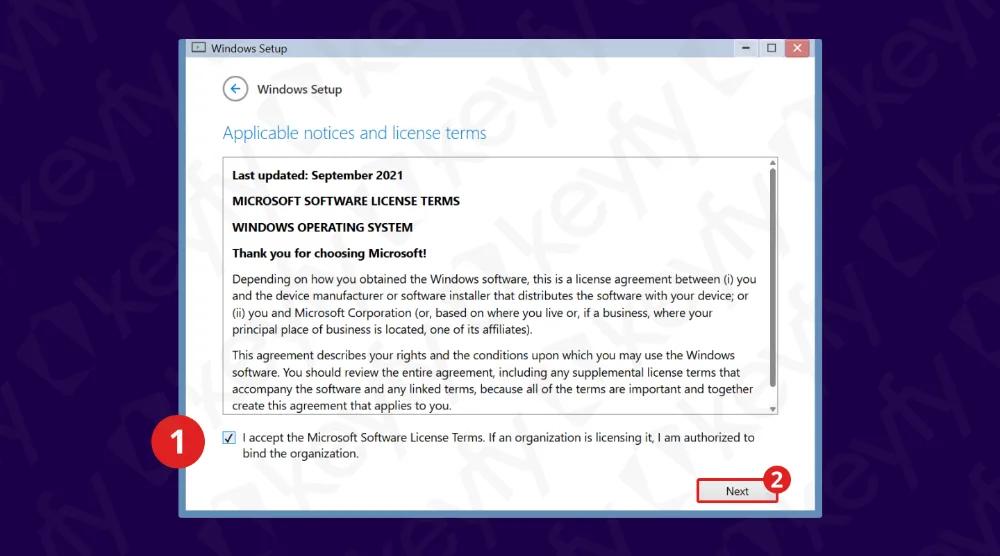
Check the box to accept the Microsoft software license terms, then click Next.
Step 18: Choose installation type (Custom)
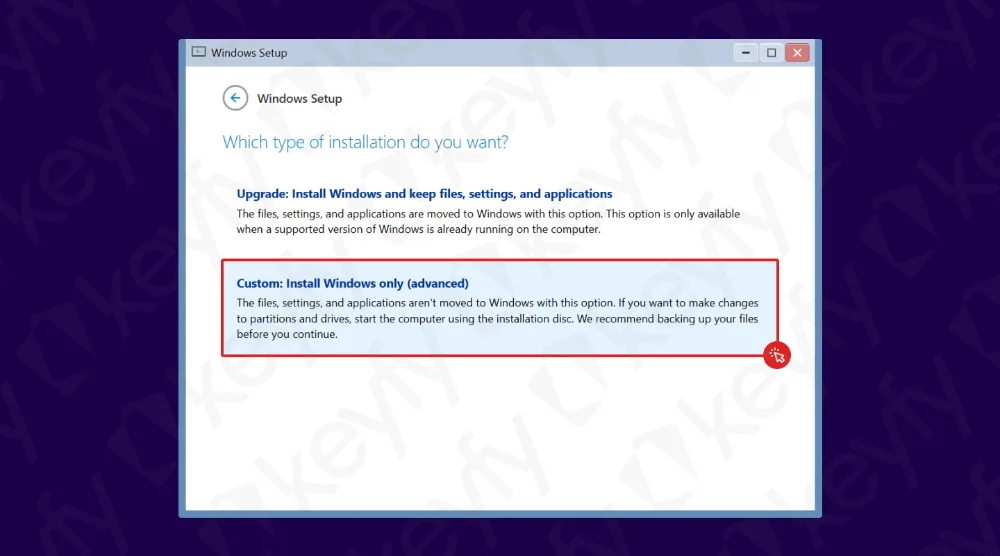
Select Custom: Install Windows only (advanced).
Step 19: Delete existing partitions (clean installation)
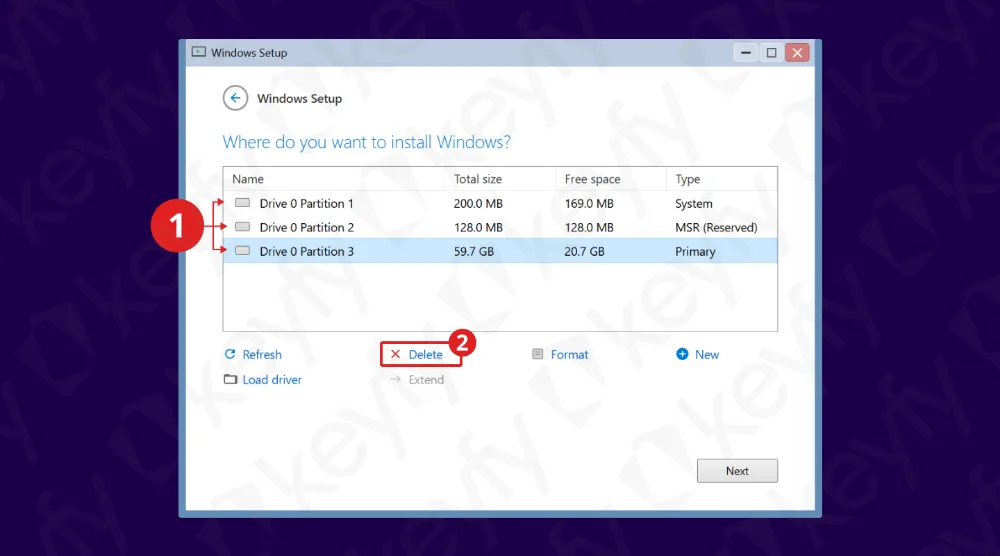
This is the clean installation step.
Select each partition on the main drive (usually Drive 0) and click Delete until you only see Unallocated Space.
Warning: Deleting partitions permanently removes data from that drive. Make sure you backed up everything important before doing this.
Step 20: Confirm the deletion warnings
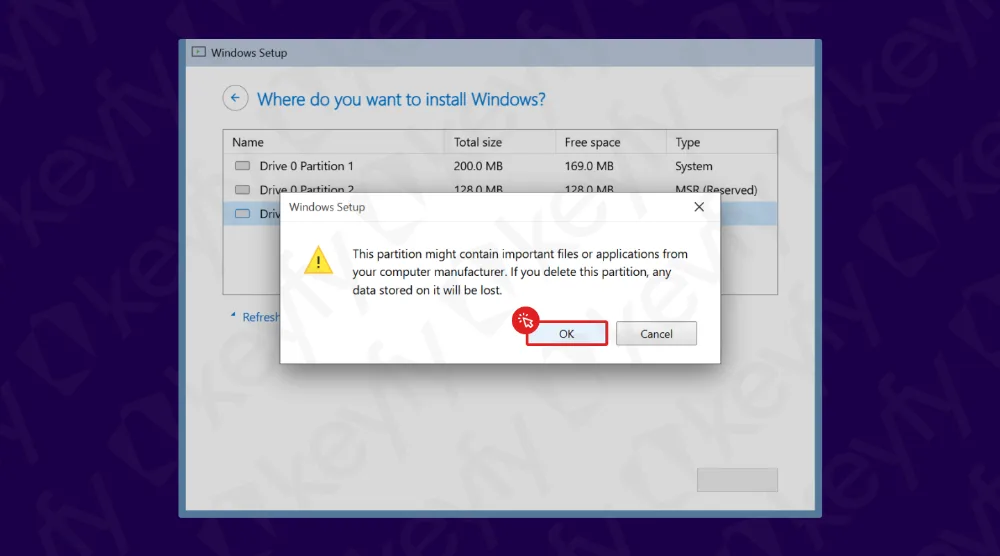
If Windows shows a warning pop-up during deletion, click OK to confirm.
Step 21: Start installation and wait for Windows to finish
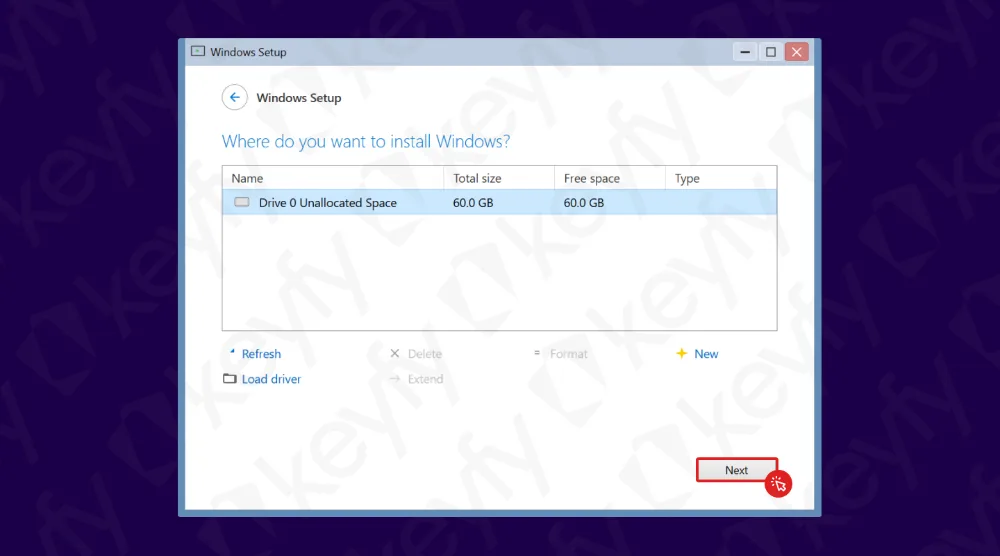
Once you see Unallocated Space, select it and click Next. Windows will begin installing.
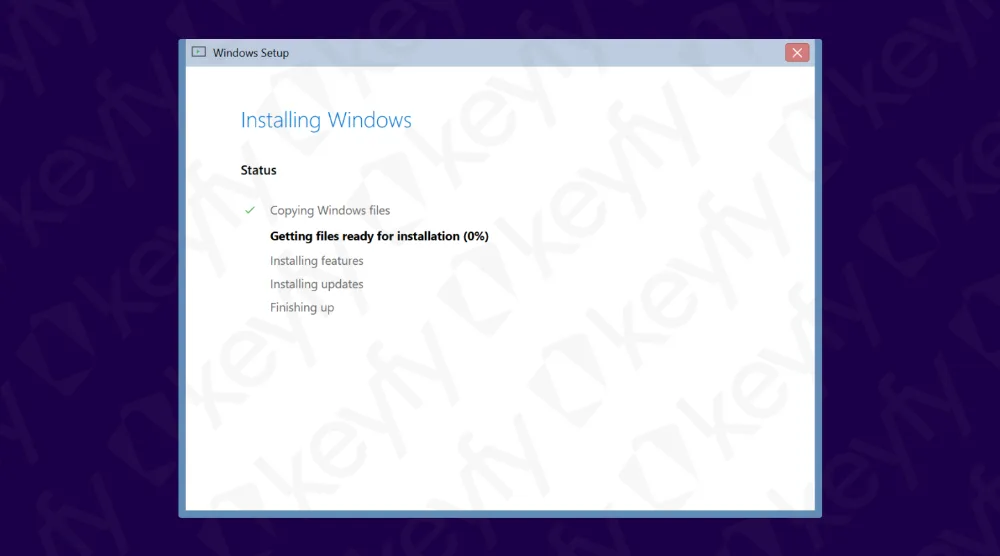
Installation can take some time and your PC may restart several times. Keep the PC powered on and do not remove the USB drive unless Windows tells you to.
After installation finishes, you’ll go through the initial setup (region, keyboard, account, privacy settings). Once completed, your Windows installation is ready.
All done
Your Windows installation is complete. If you skipped entering a product key during setup, you can activate Windows after installation using your key.
If you need productivity software after installing Windows, you can also explore options like Microsoft Office, antivirus tools, and other utilities in our store.