




 Nederlands
 Italiano
 Português
 Română
 Español
 Ελληνικά
 Polski
 Türkçe


This guide shows how to install (or upgrade to) Windows 11 using the official Windows 11 ISO file.
Before you start
- Back up important files (just in case).
- Make sure your PC has enough free space (Windows 11 install files are large).
- Keep your PC plugged into power (especially on laptops).
- The ISO download is usually around 5–6 GB, so a stable internet connection helps.
Step 1: Download the official Windows 11 ISO
Download the official Windows 11 installation ISO from Microsoft using our link below:
Download the official Windows 11 ISO file
Once the ISO is downloaded, continue to the next step.
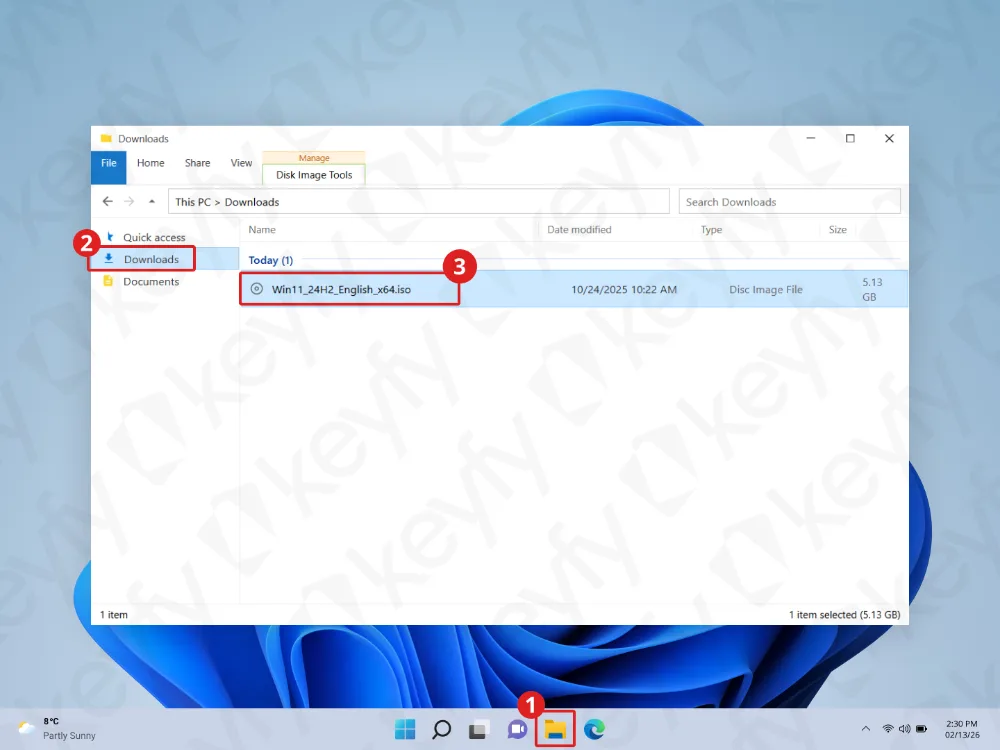
Step 2: Locate the ISO file in File Explorer
Open File Explorer and go to the folder where the ISO was downloaded (usually Downloads). Then double-click the ISO file to open it.
Step 3: Open the ISO and run “setup.exe”
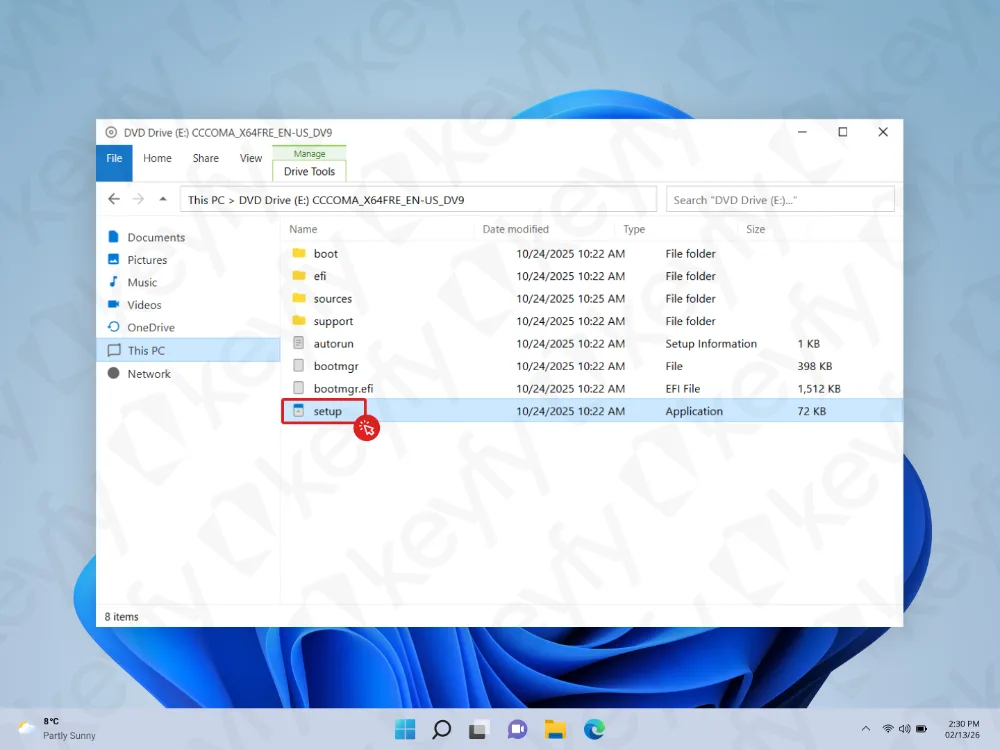
After you open the ISO, a new window will appear showing the ISO contents (it often looks like a DVD drive). Find setup (setup.exe) and double-click it to begin the installation.
Step 4: Allow Windows Setup to make changes
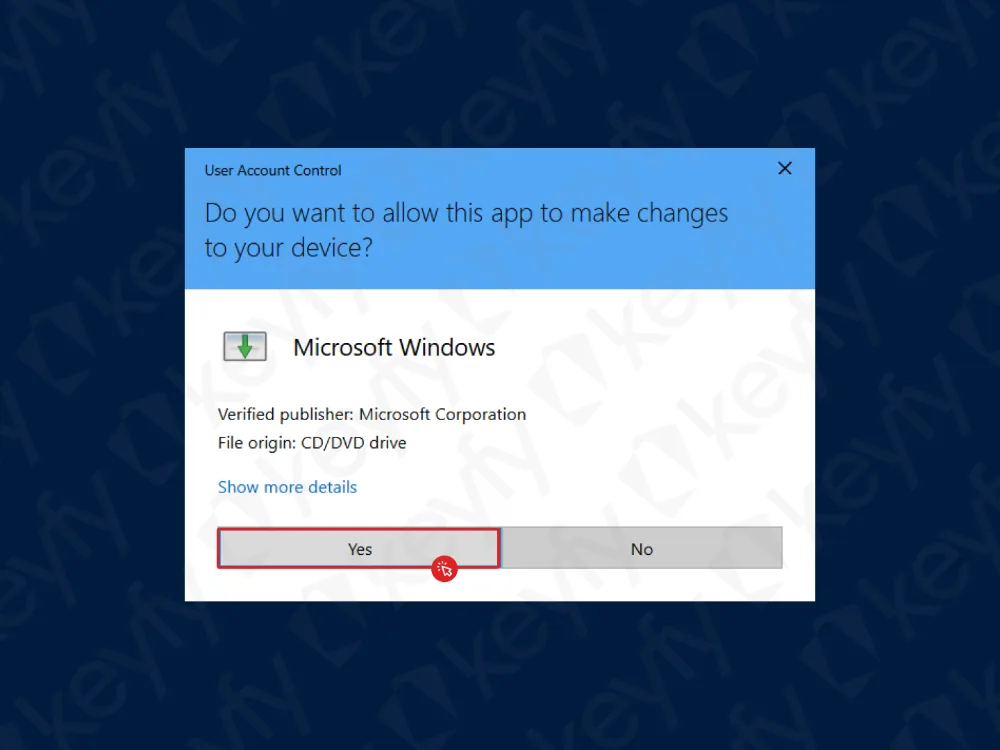
Windows may show a security prompt (User Account Control). Click Yes to allow Windows Setup to run.
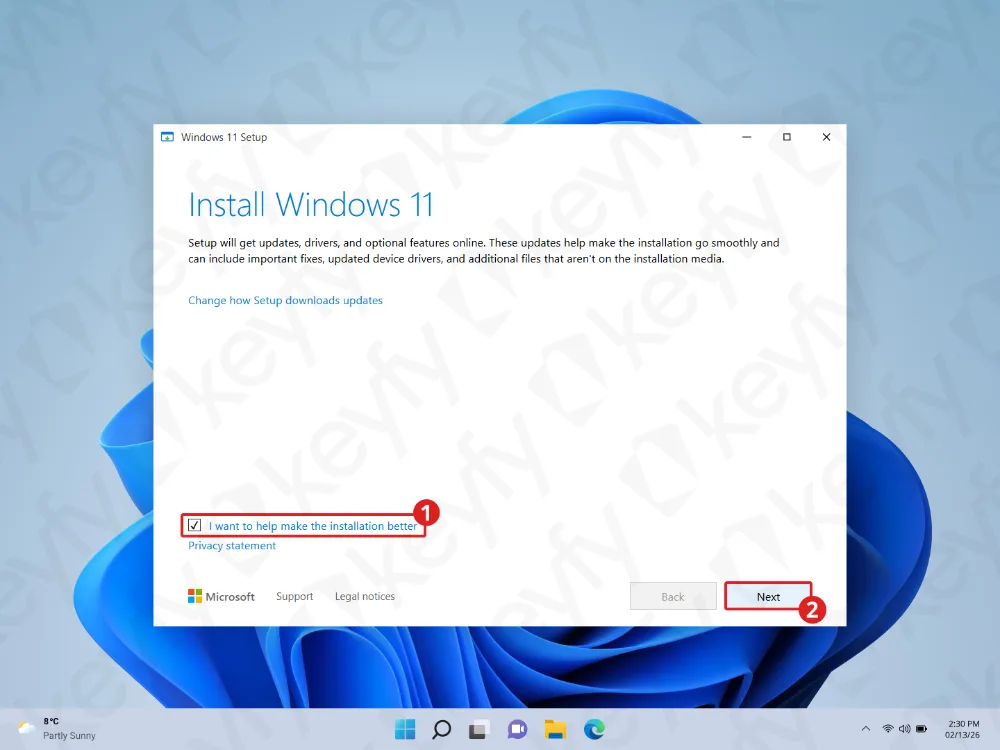
Step 5: Confirm the optional setup checkbox and continue
On the “Install Windows 11” screen, you may see an optional checkbox (for helping improve the installation experience). Leave it enabled (or adjust if you prefer), then click Next.
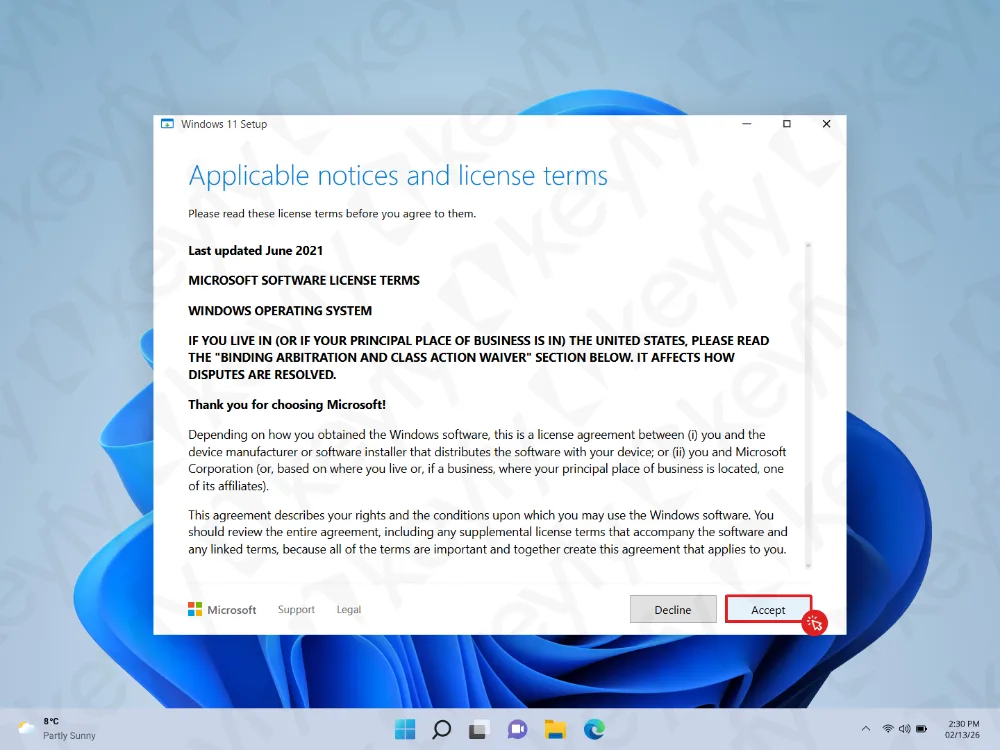
Step 6: Accept the license terms
Read the license terms and click Accept to continue.
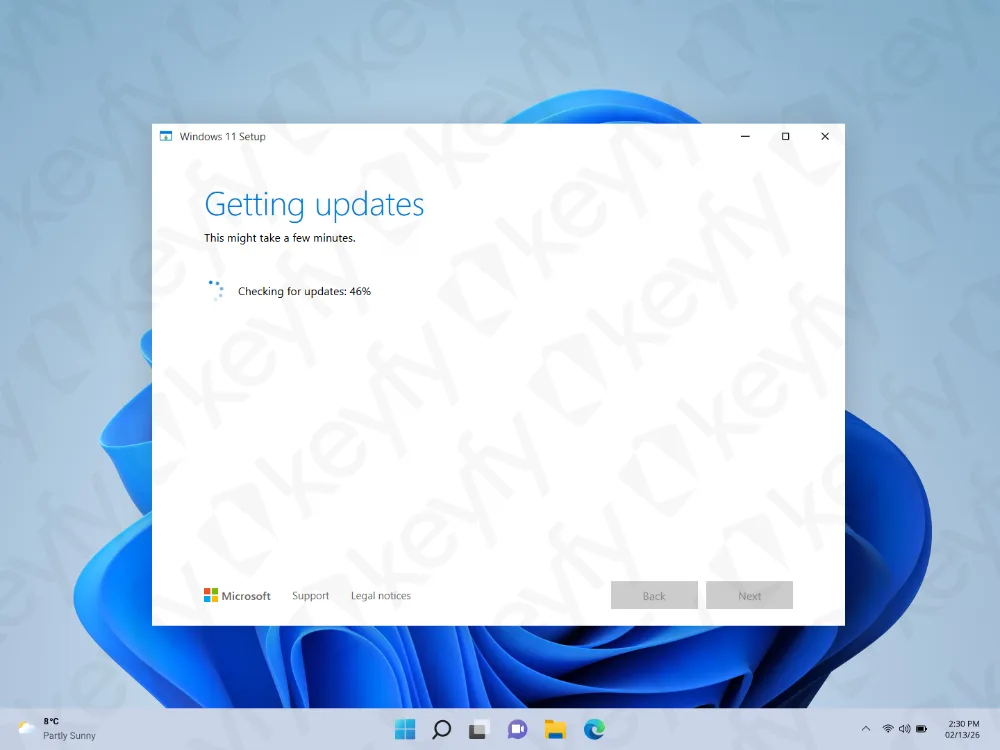
Step 7: Wait while Windows checks for updates
Windows Setup will check and prepare updates. This can take a few minutes. Keep your PC on and wait until the next screen appears.
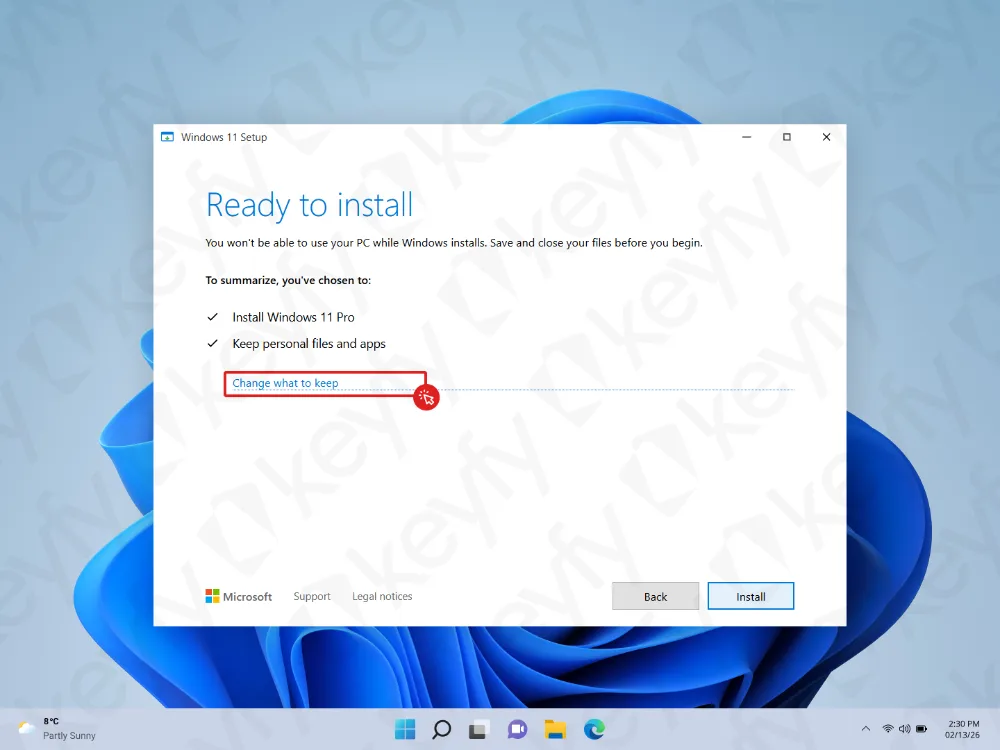
Step 8: Review “Ready to install” and open the “keep” options
When you see the Ready to install screen, you can review what will be installed. If you want to choose what Windows should keep, click Change what to keep.
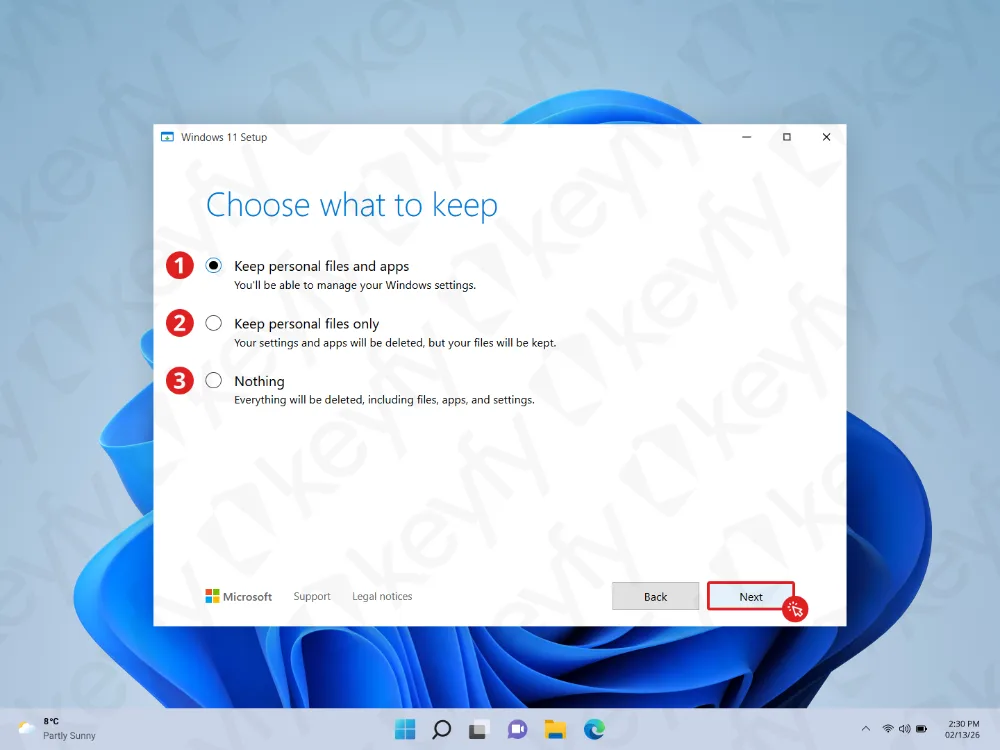
Step 9: Choose what to keep
Select the option that fits your situation:
- Keep personal files and apps – best choice for most users (keeps your files and installed apps).
- Keep personal files only – keeps your files, but removes apps.
- Nothing – removes everything (apps, files, and settings). Use only if you want a clean start.
After selecting the option you want, click Next.
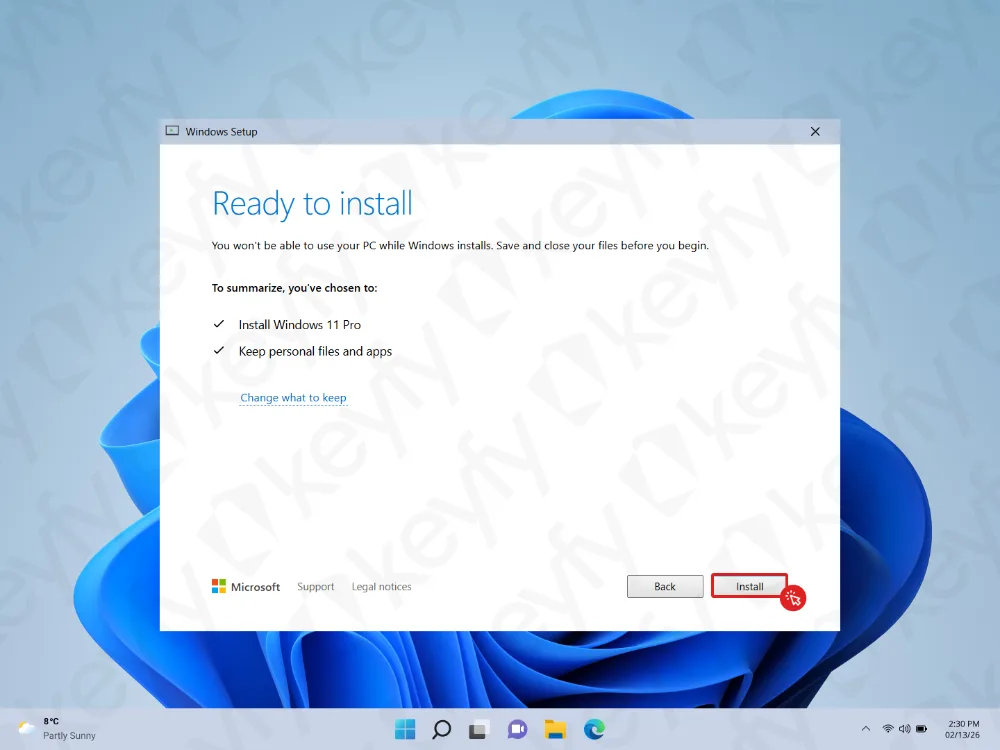
Step 10: Start the installation
You’ll return to the Ready to install screen. Close any open programs, save your work, then click Install.
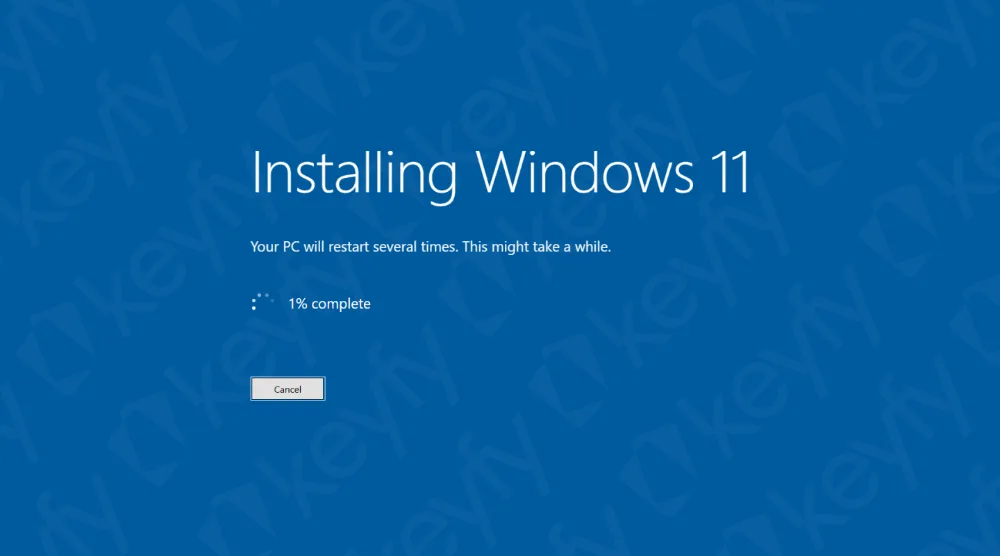
Step 11: Wait while Windows 11 installs
Windows will begin installing. Your PC may restart several times — this is normal. Do not turn off your computer during this process.
Step 12: Installation complete
When everything is finished, Windows 11 will load and you can start using your PC.
If you need software for work or everyday use, you can also check our store for tools like Microsoft Office, antivirus, VPN, or professional apps (for example: Project or Visual Studio).