





 Nederlands
 Italiano
 Português
 Română
 Español
 Ελληνικά
 Polski
 Türkçe


This guide shows how to upgrade Windows 11 Home to Windows 11 Pro, then activate Windows 11 Pro using the product key you purchased.
Before you start
- Save your work and close open programs.
- If you’re on a laptop, plug it into power.
- Have your Windows 11 Pro product key ready (you’ll enter it near the end).
- You’ll temporarily disconnect from the internet, then reconnect for activation.
Step 1: Open Network Connections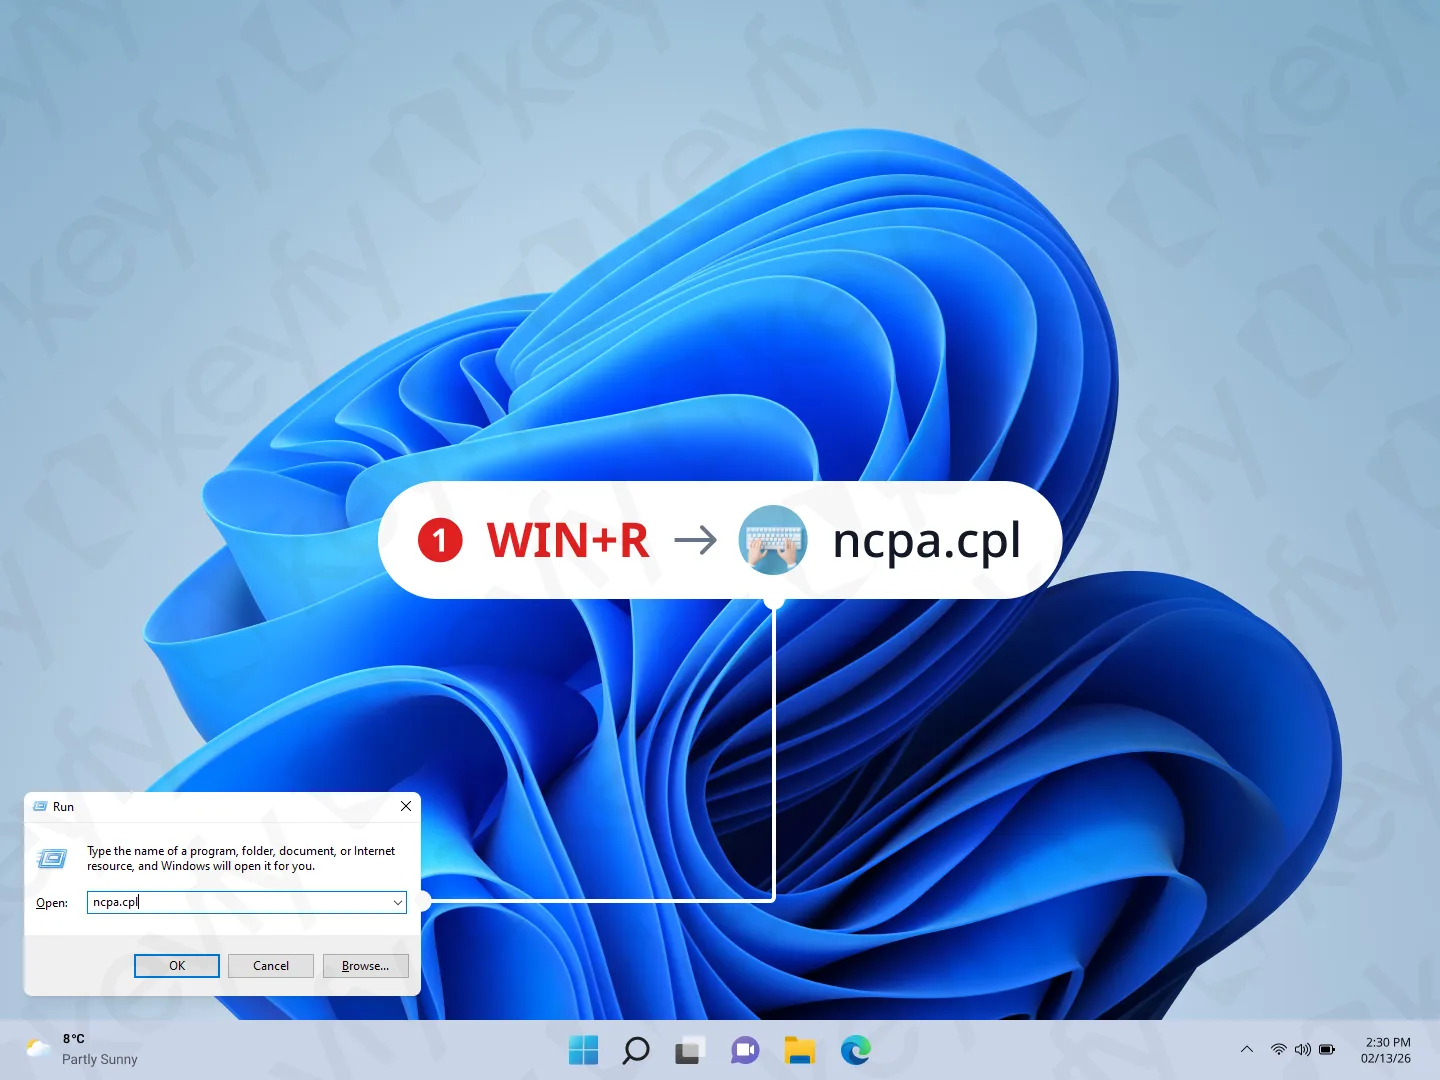
Press Windows + R, type ncpa.cpl, and press Enter.
This opens the Network Connections window where you can manage Wi-Fi/Ethernet adapters.
Step 2: Disconnect from the internet (disable adapters)

In Network Connections, disable the internet adapters you use:
- Right-click Wi-Fi → Disable
- Right-click Ethernet → Disable (if present)
- Bluetooth Network Connection → Disable (optional)
Goal: Your PC should be offline for the edition-switch step.
Step 3: Open Activation settings and start the upgrade
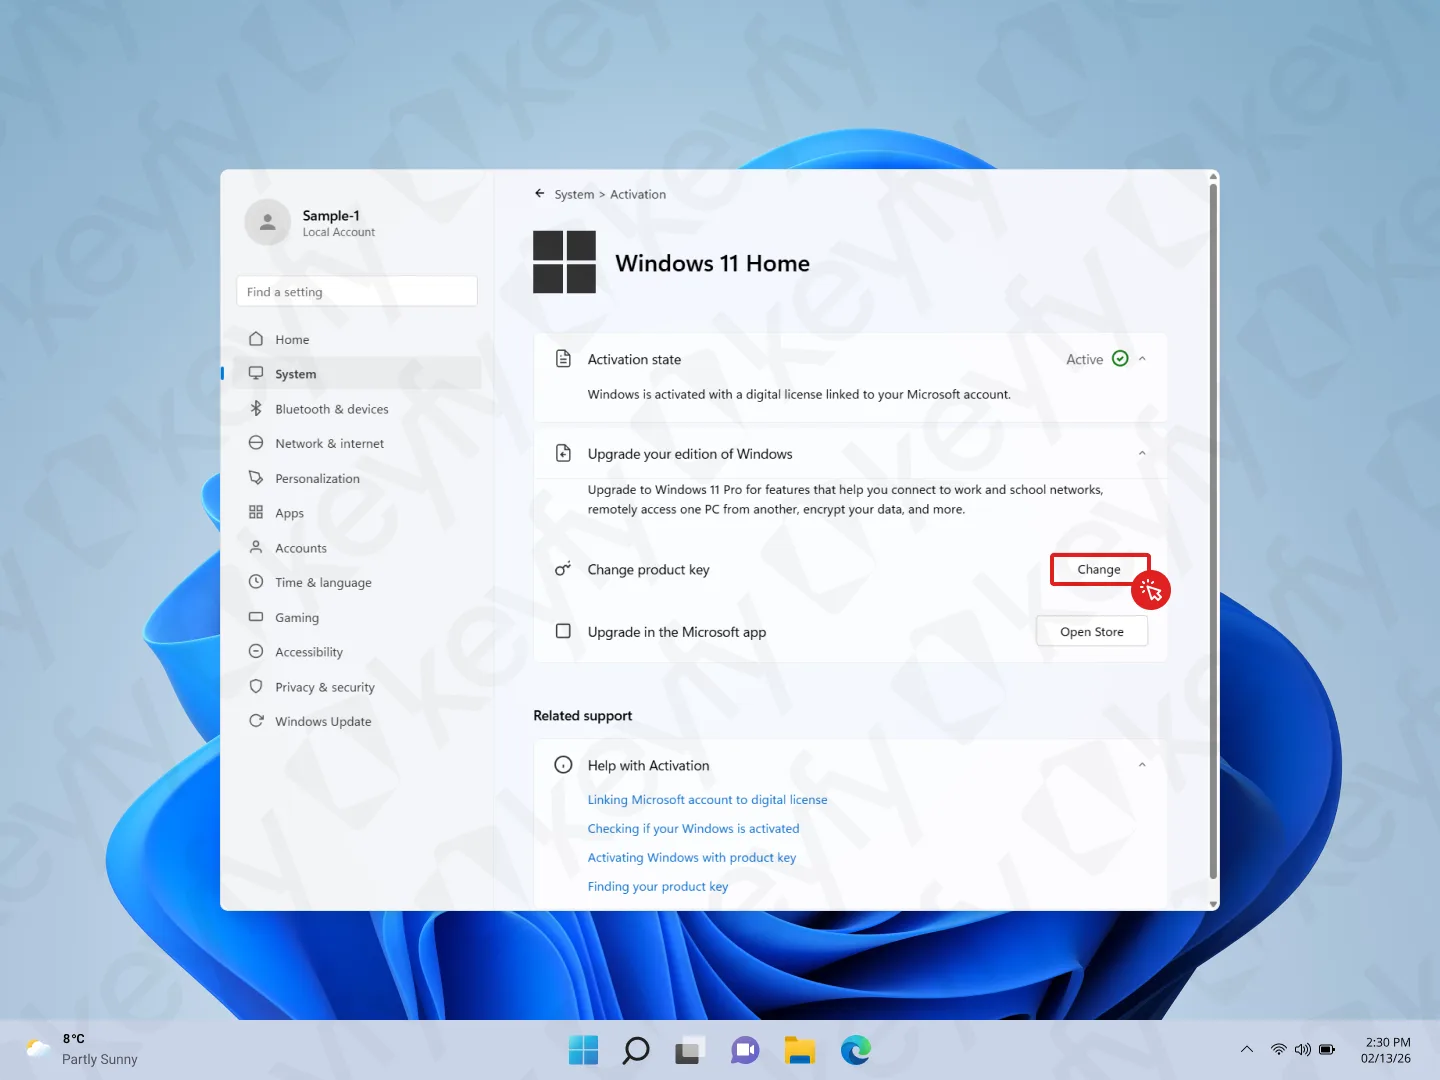
Open Settings → System → Activation.
Under Upgrade your edition of Windows, click Change next to Change product key.
Step 4: Enter the generic upgrade key
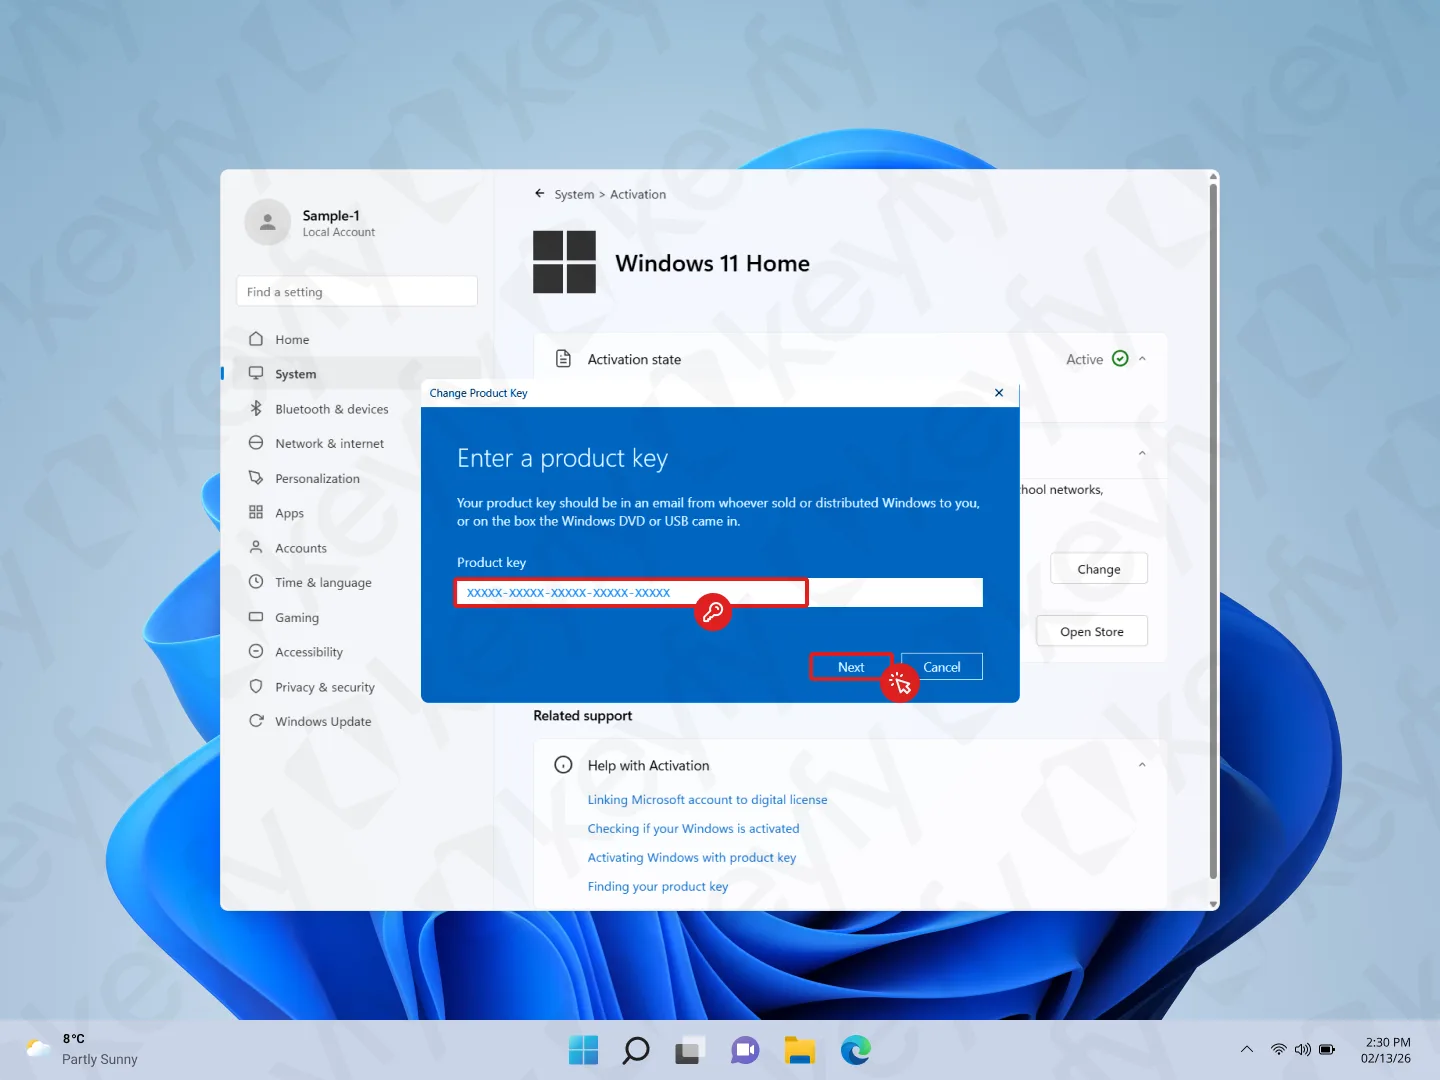
In the “Enter a product key” window, enter the following generic upgrade key:
Upgrade Key: VK7JG-NPHTM-C97JM-9MPGT-3V66T
Confirm the process by clicking Next.
Important: This key is used to kickstart the edition upgrade (Home → Pro). It does not activate Windows. You will activate later using your purchased key.
Step 5: Confirm the edition upgrade
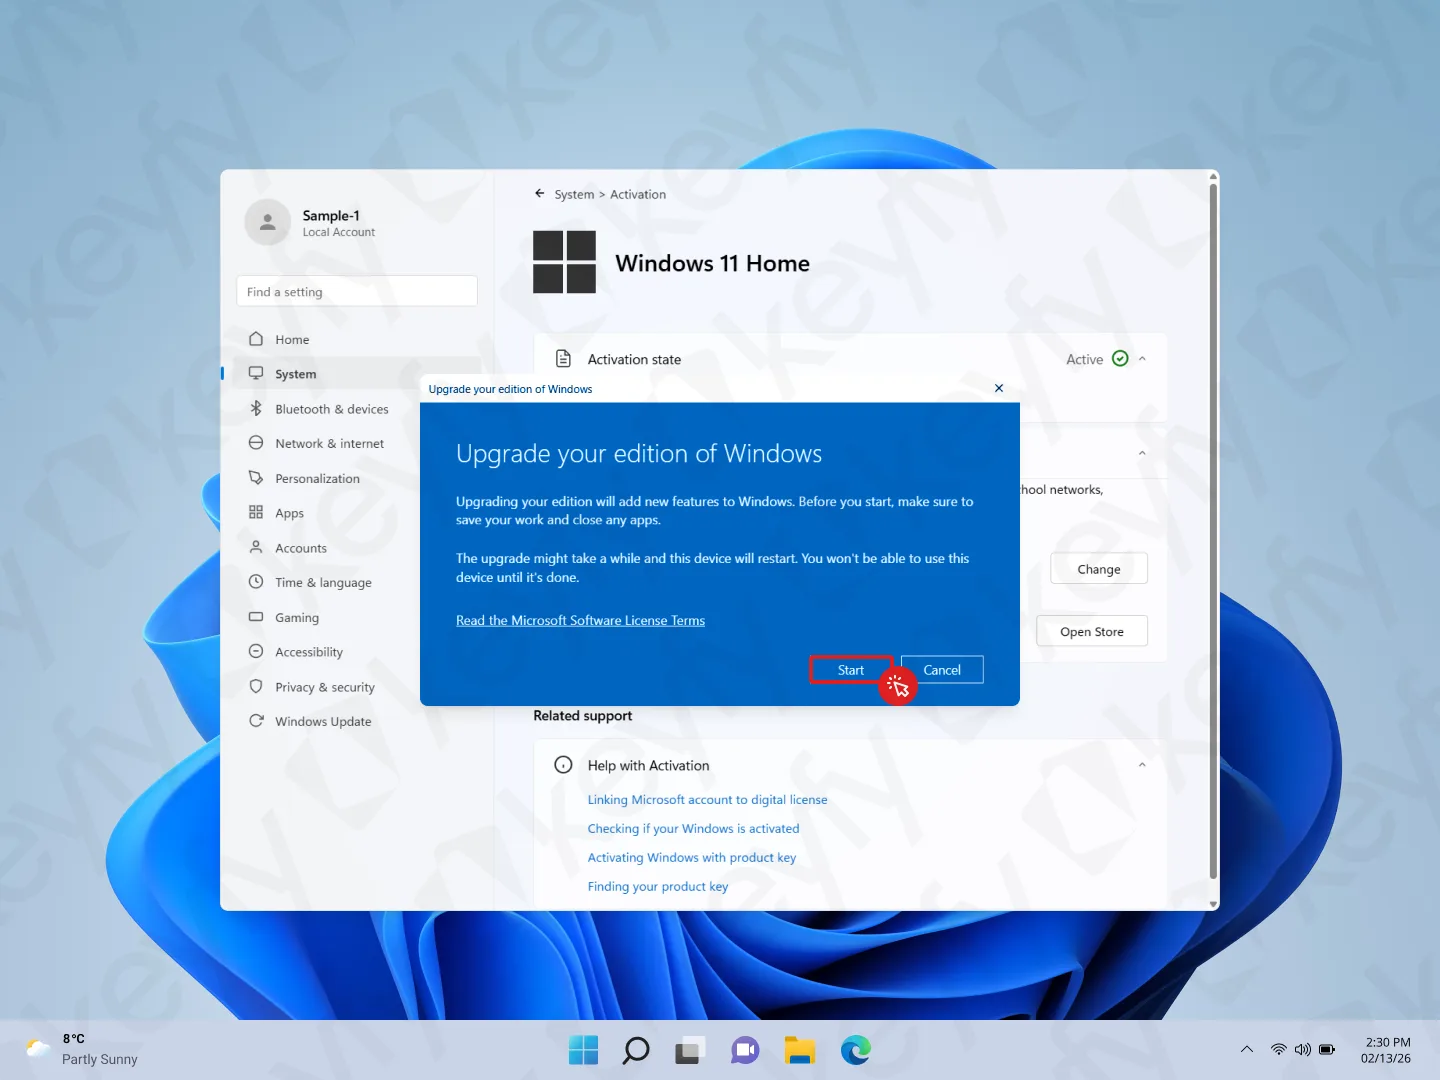
You’ll see “Upgrade your edition of Windows”. Click Start.
Windows will begin upgrading to Windows 11 Pro and may restart during the process.
Step 6: Wait while Windows prepares the upgrade
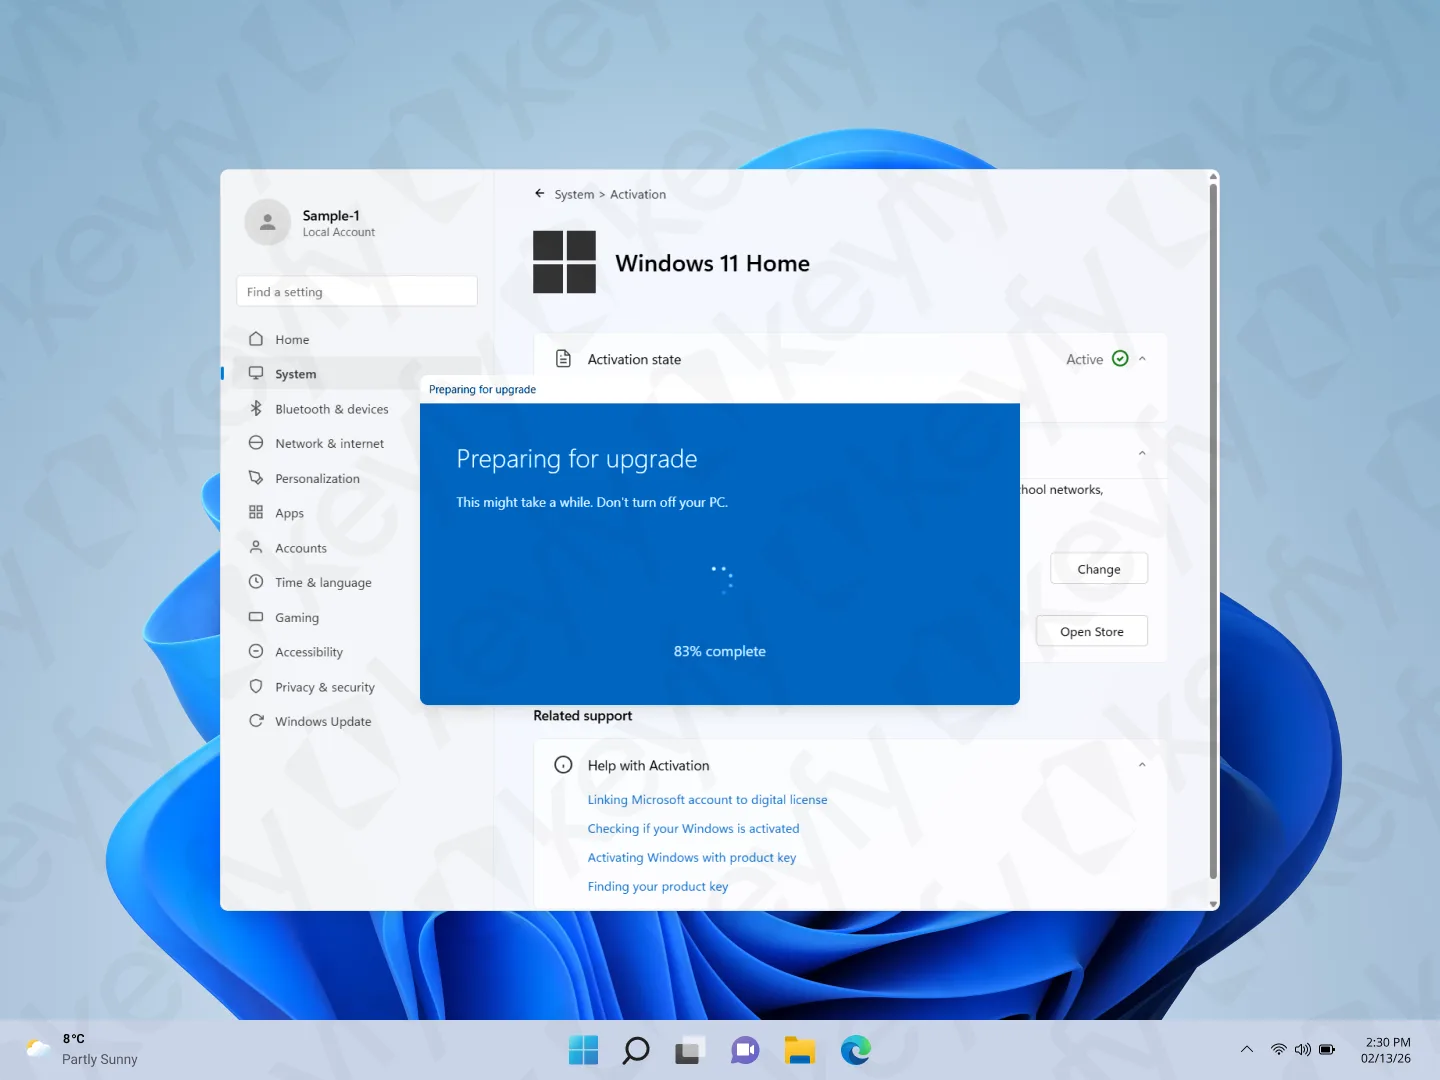
You’ll see “Preparing for upgrade” with a progress percentage.
Do not turn off your PC.
Step 7: Wait for “Adding features”
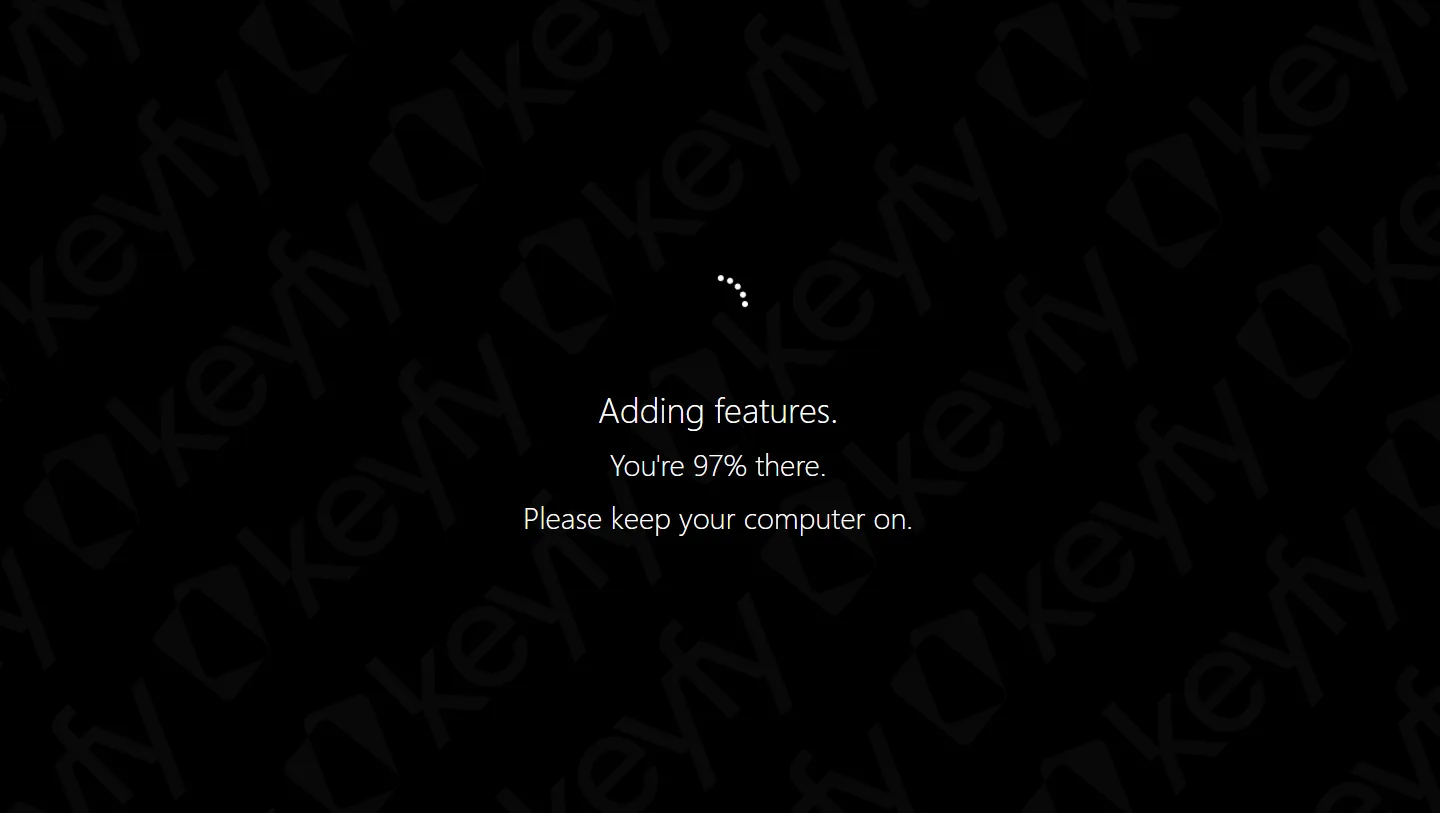
You may see a full-screen message like: “Adding features… Please keep your computer on.”
Just wait until it completes.
Step 8: Check Activation (expected: Not active while offline)
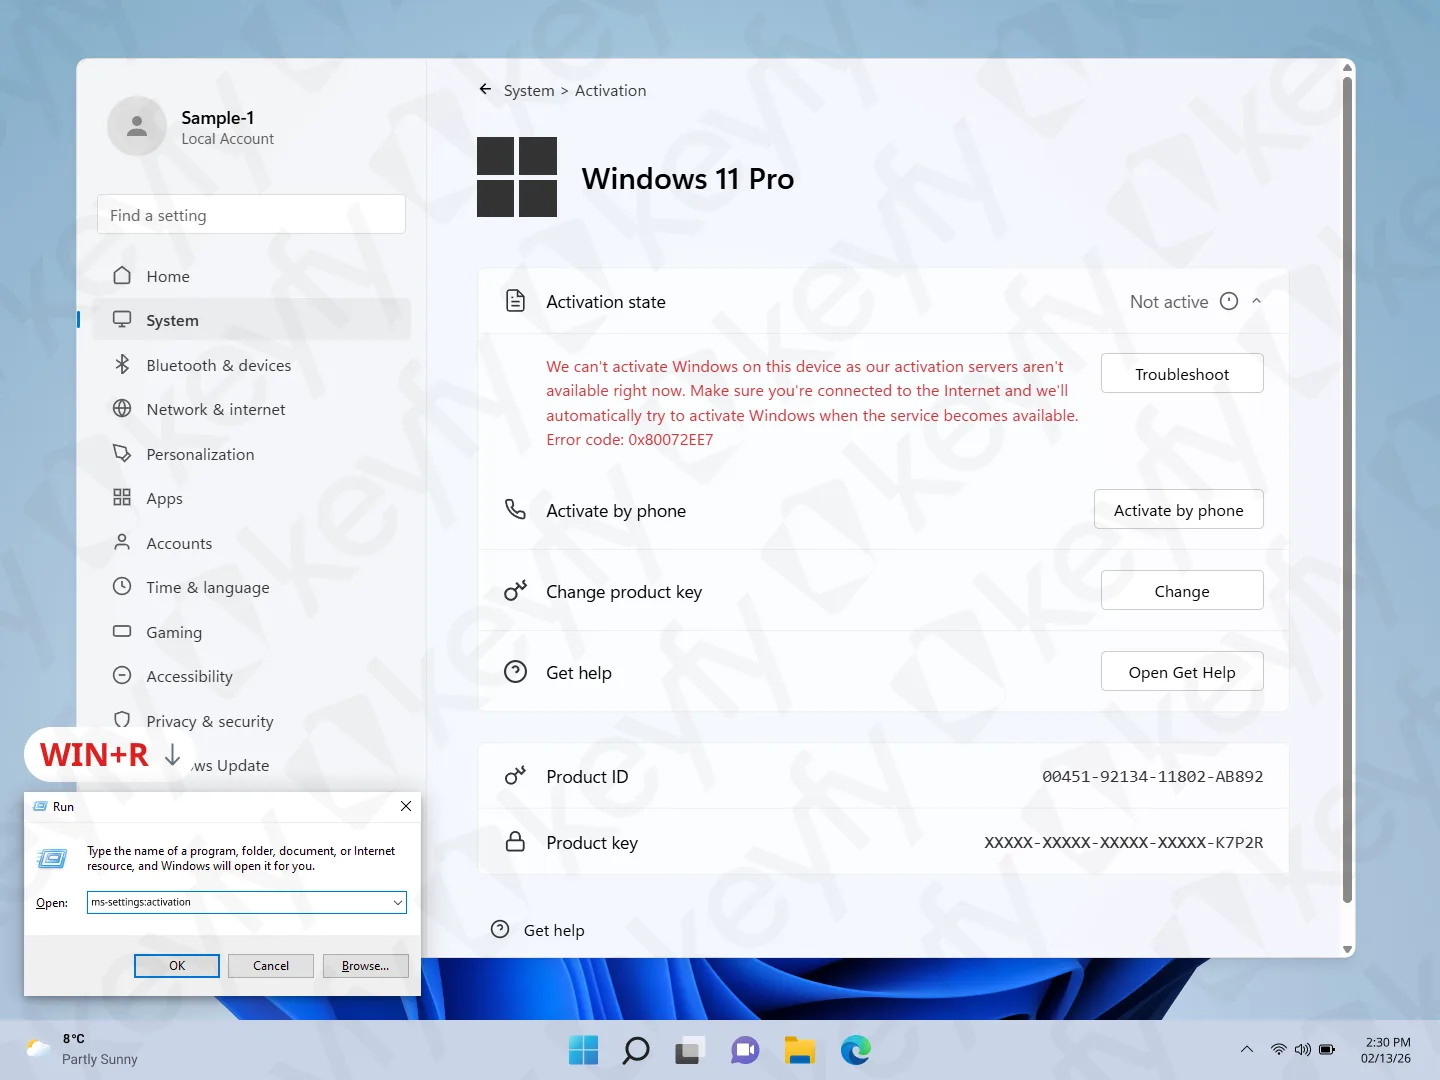
After the upgrade finishes, open Activation again (or press Windows + R and run ms-settings:activation).
You should now see Windows 11 Pro.
If you see Not active with a red message, that’s normal at this moment because the internet is still disabled.
Step 9: Reconnect to the internet (enable adapters)
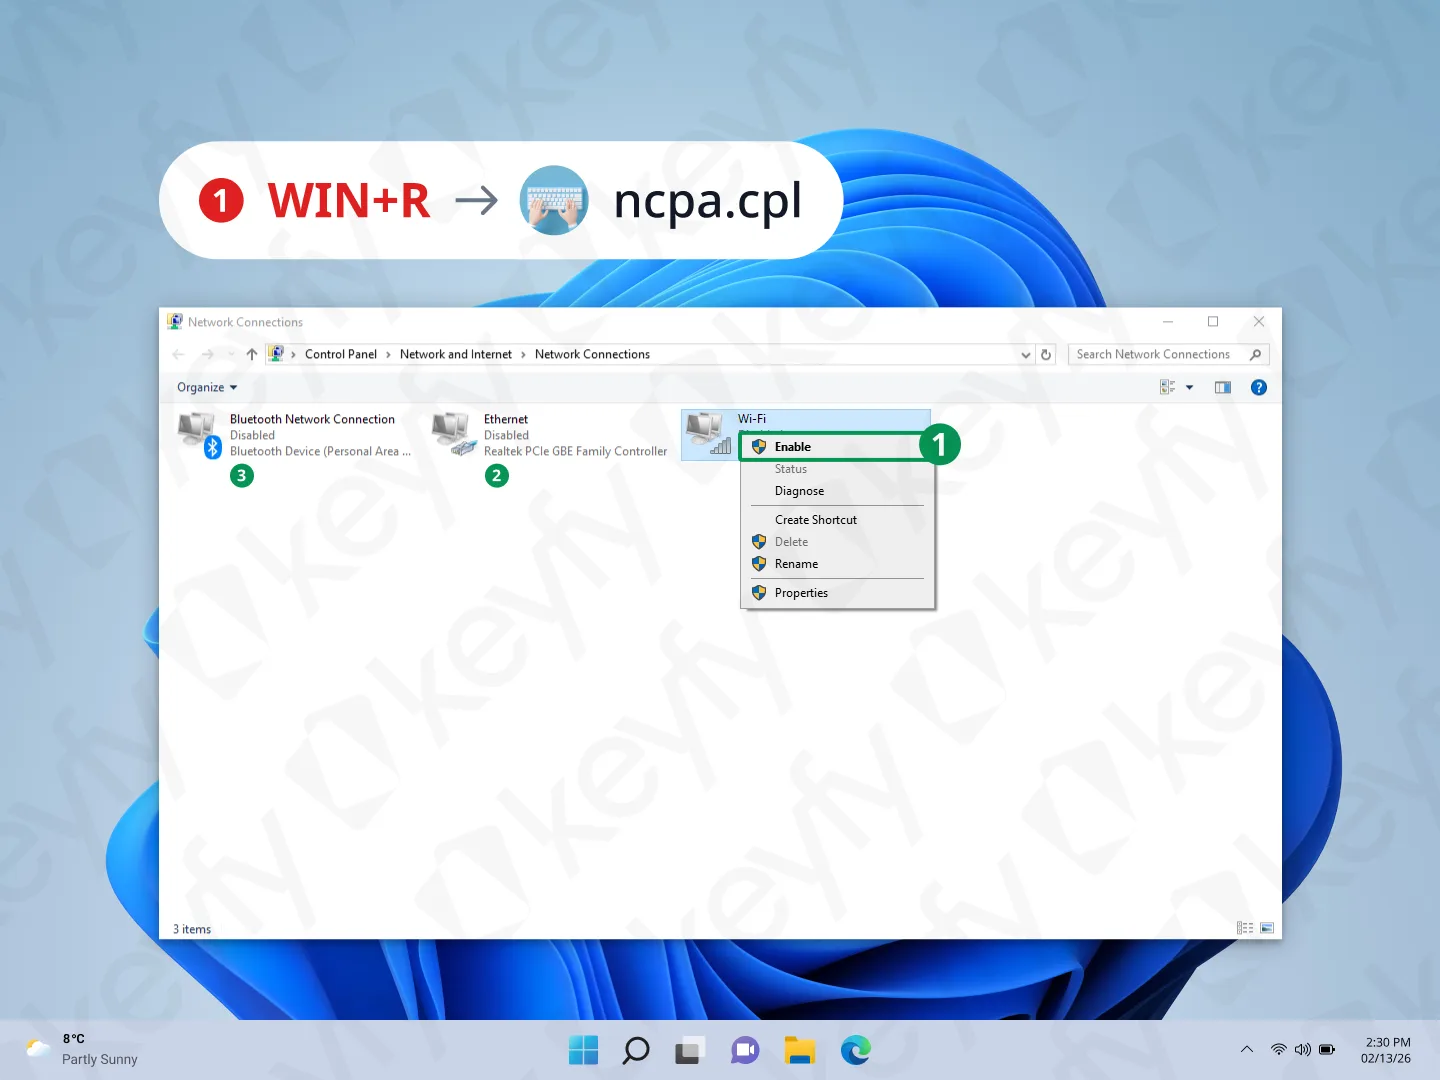
Press Windows + R, type ncpa.cpl, and press Enter.
Enable your connection again:
- Right-click Wi-Fi → Enable (or)
- Right-click Ethernet → Enable
You only need one working connection method.
Step 10: Enter your purchased Windows 11 Pro key
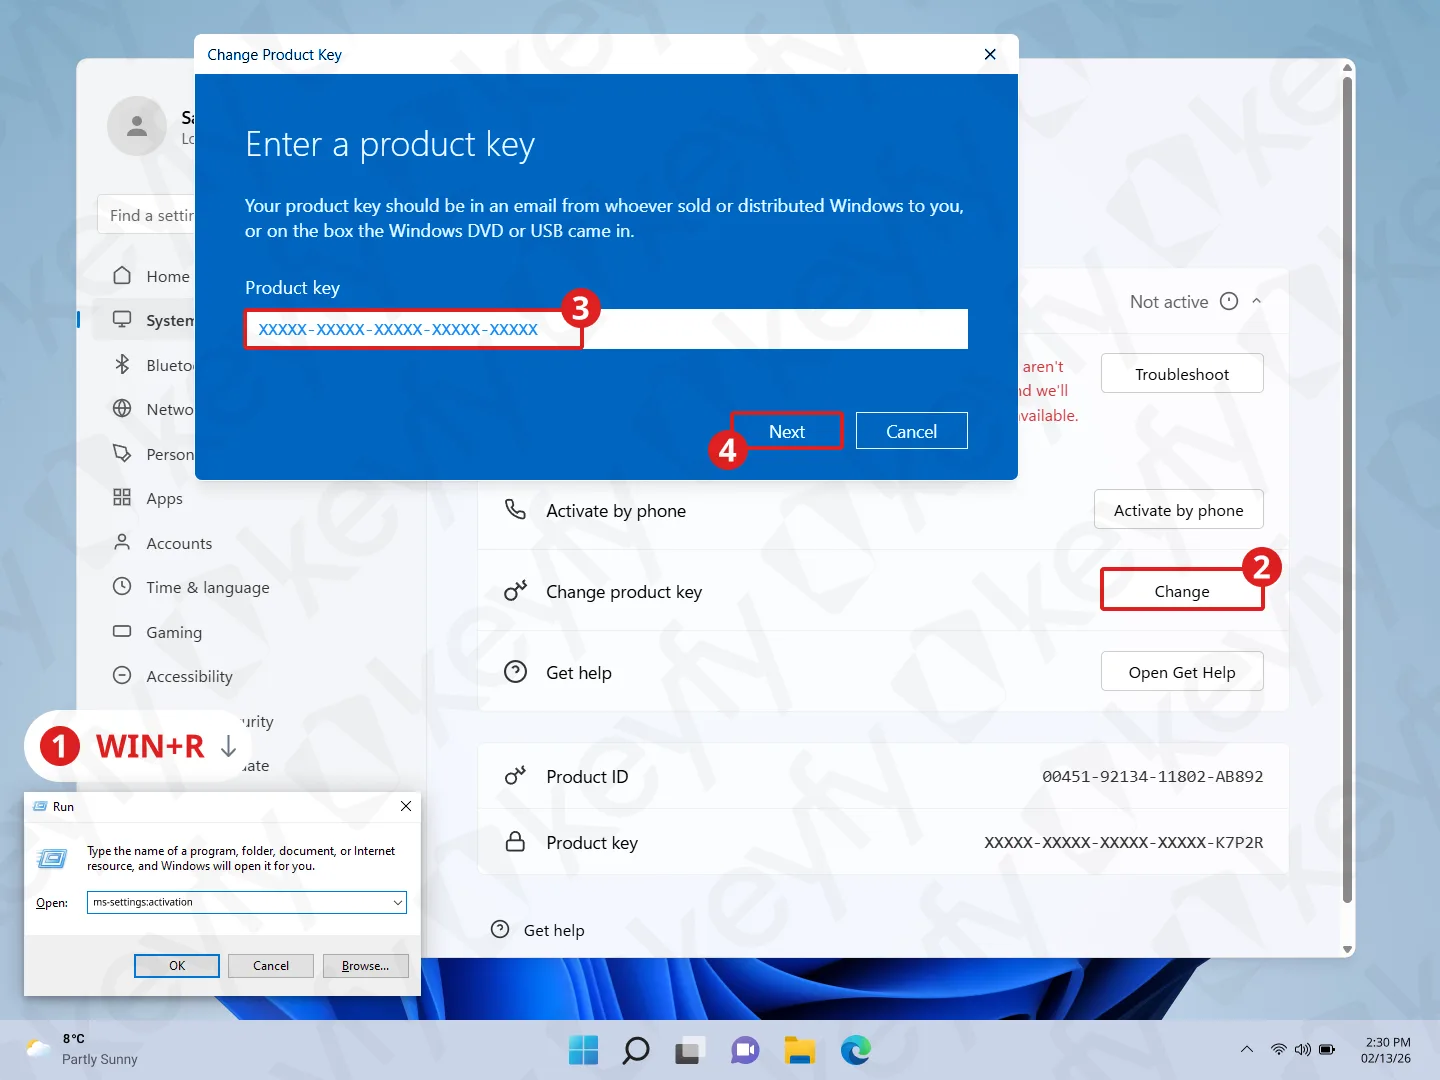
Go back to Settings → System → Activation.
Under Change product key, click Change, paste your purchased Windows 11 Pro key, then click Next.
Step 11: Confirm activation
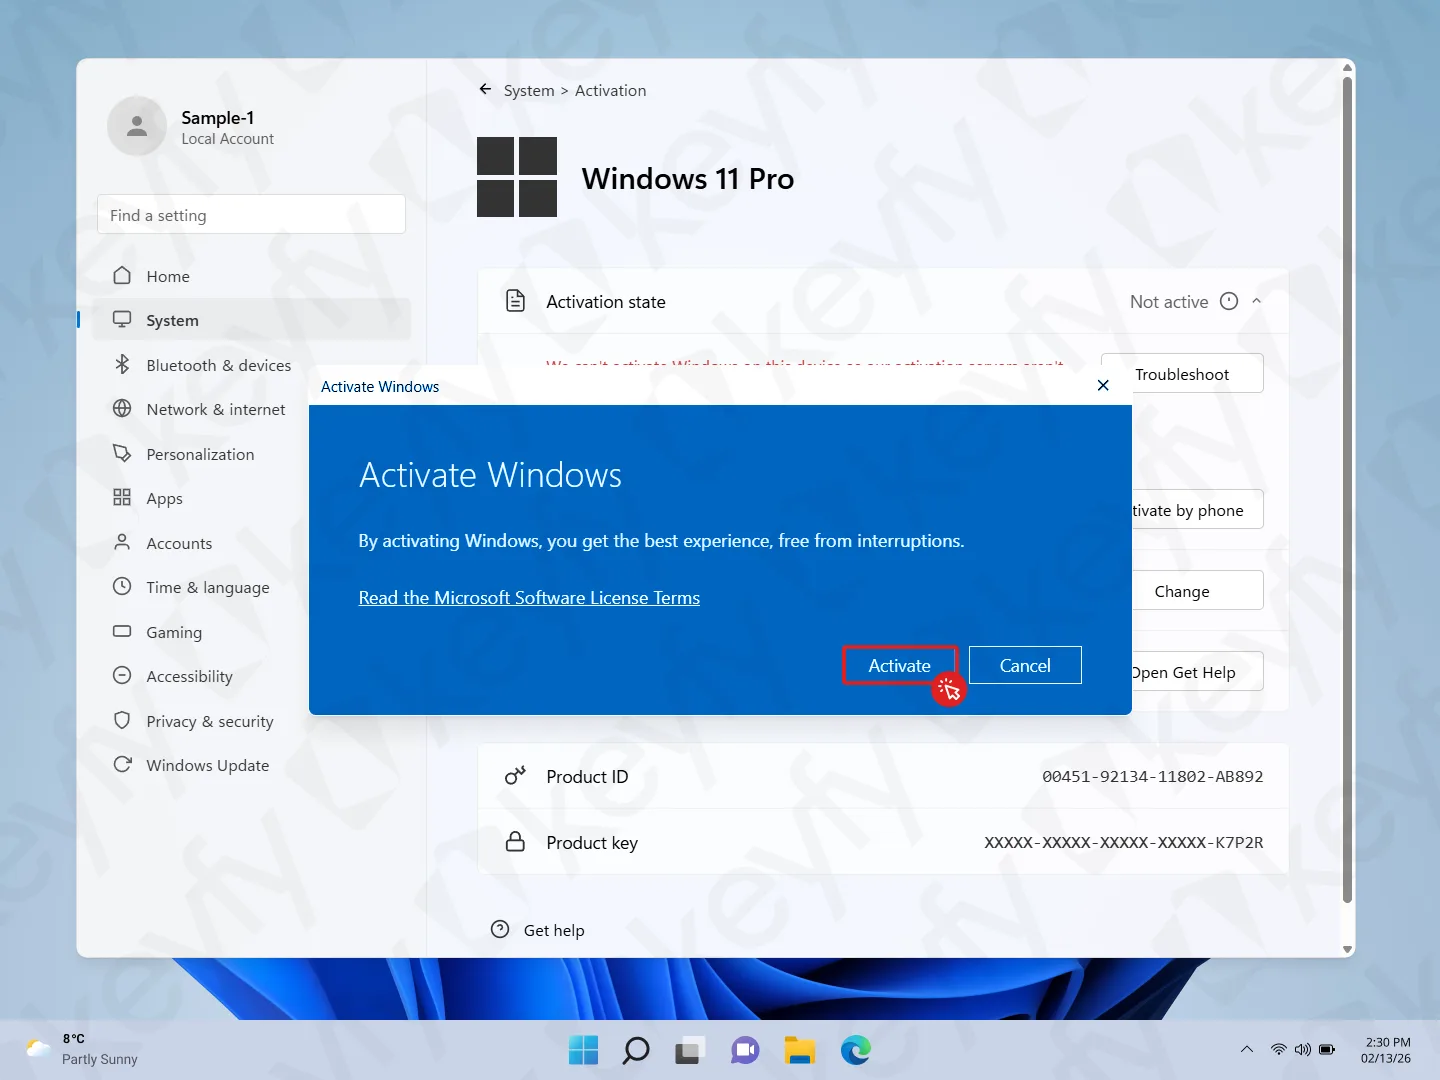
If a popup appears saying Activate Windows, click Activate.
If no popup appears, Windows may activate automatically in the background—just check the Activation status on the page.
Step 12: Done (Activated)
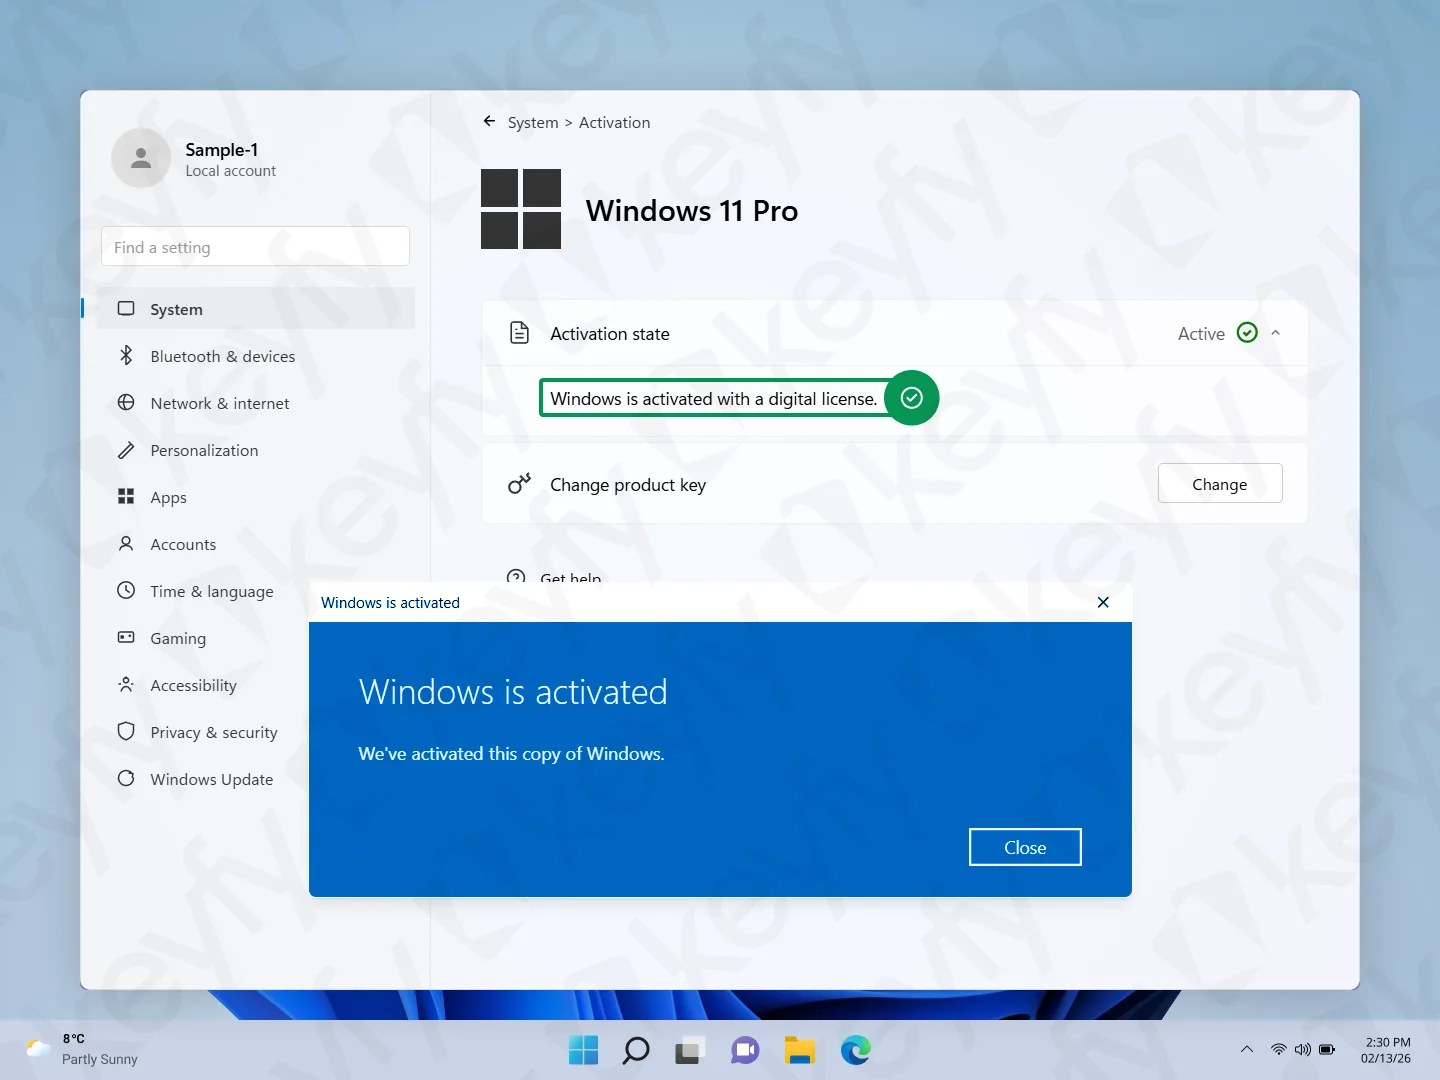
You’ll see:
- Activation state: Active ✅
- Windows is activated with a digital license
- A confirmation message “Windows is activated” (click Close)
That’s it—your PC is now running Windows 11 Pro and is activated.
Quick troubleshooting
- Still “Not active”? Restart your PC once and check Settings → System → Activation again.
- Key not accepted? Double-check you pasted the key correctly (no extra spaces) and that it’s the correct edition (Windows 11 Pro).
- Activation errors? Confirm you’re online (Wi-Fi/Ethernet enabled and working), then try again.